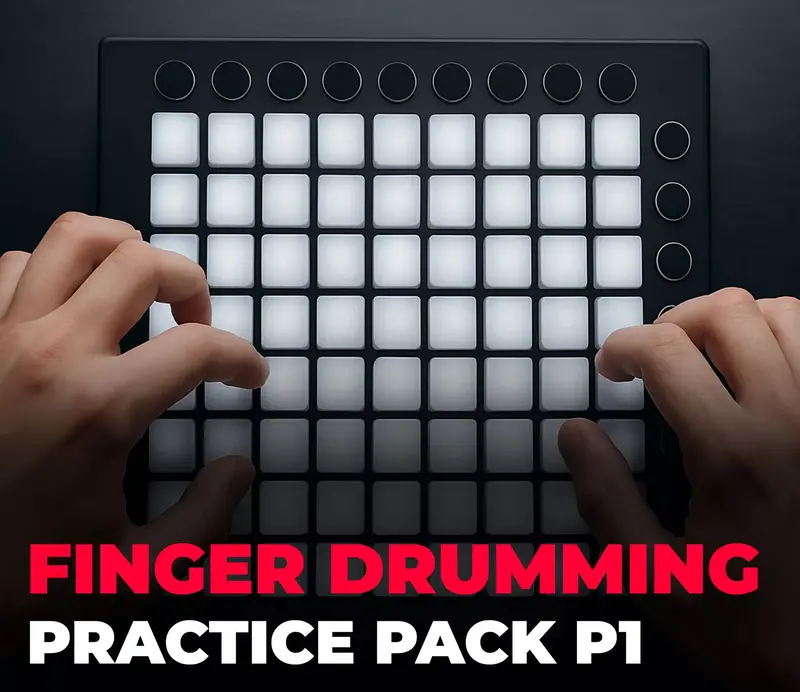
You just got the hardware. The pads are lit, the software is open, and right now every pad feels equally valid. That is the mistake.
The pad layout you choose in your first week of Launchpad or Maschine finger drumming becomes muscle memory. Remap it later and you are relearning coordination from scratch. This guide covers the four decisions that determine whether your finger drumming setup works from day one — pad zones, sound selection, DAW routing, and the diagnostic you run before you play your first beat.
What's Inside This Guide
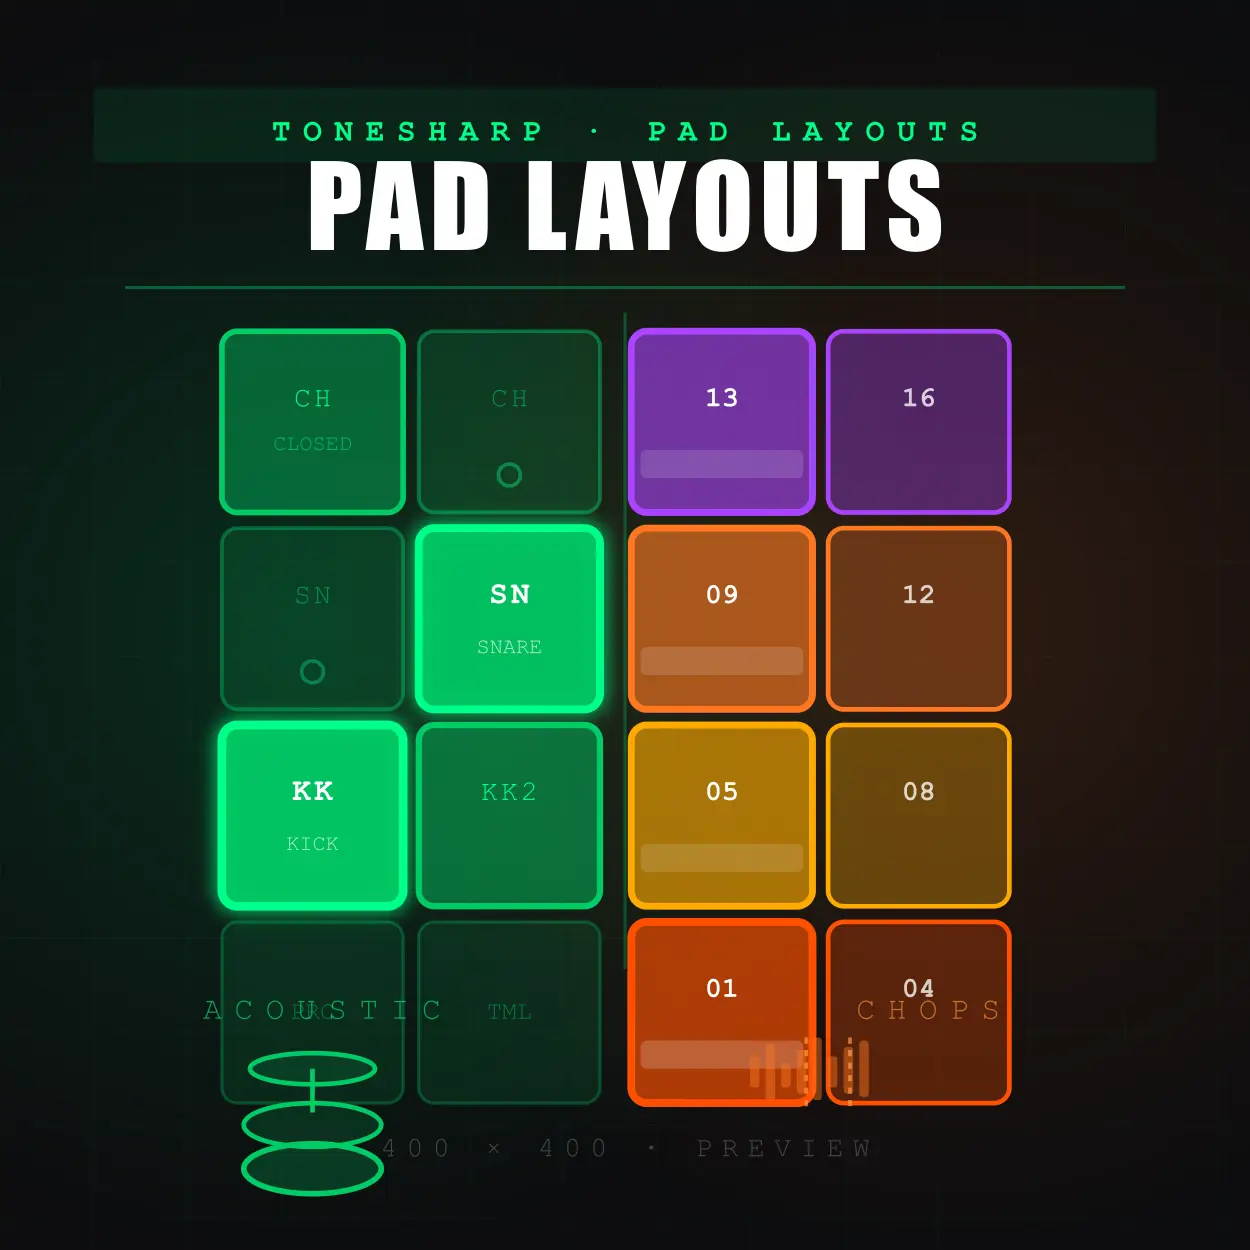
The Standard Finger Drumming Layout

The finger drumming layout that works across Launchpad, Maschine, and every other 4×4 pad controller is built on one principle: it mirrors how a physical drum kit is arranged — left to right, low to high.
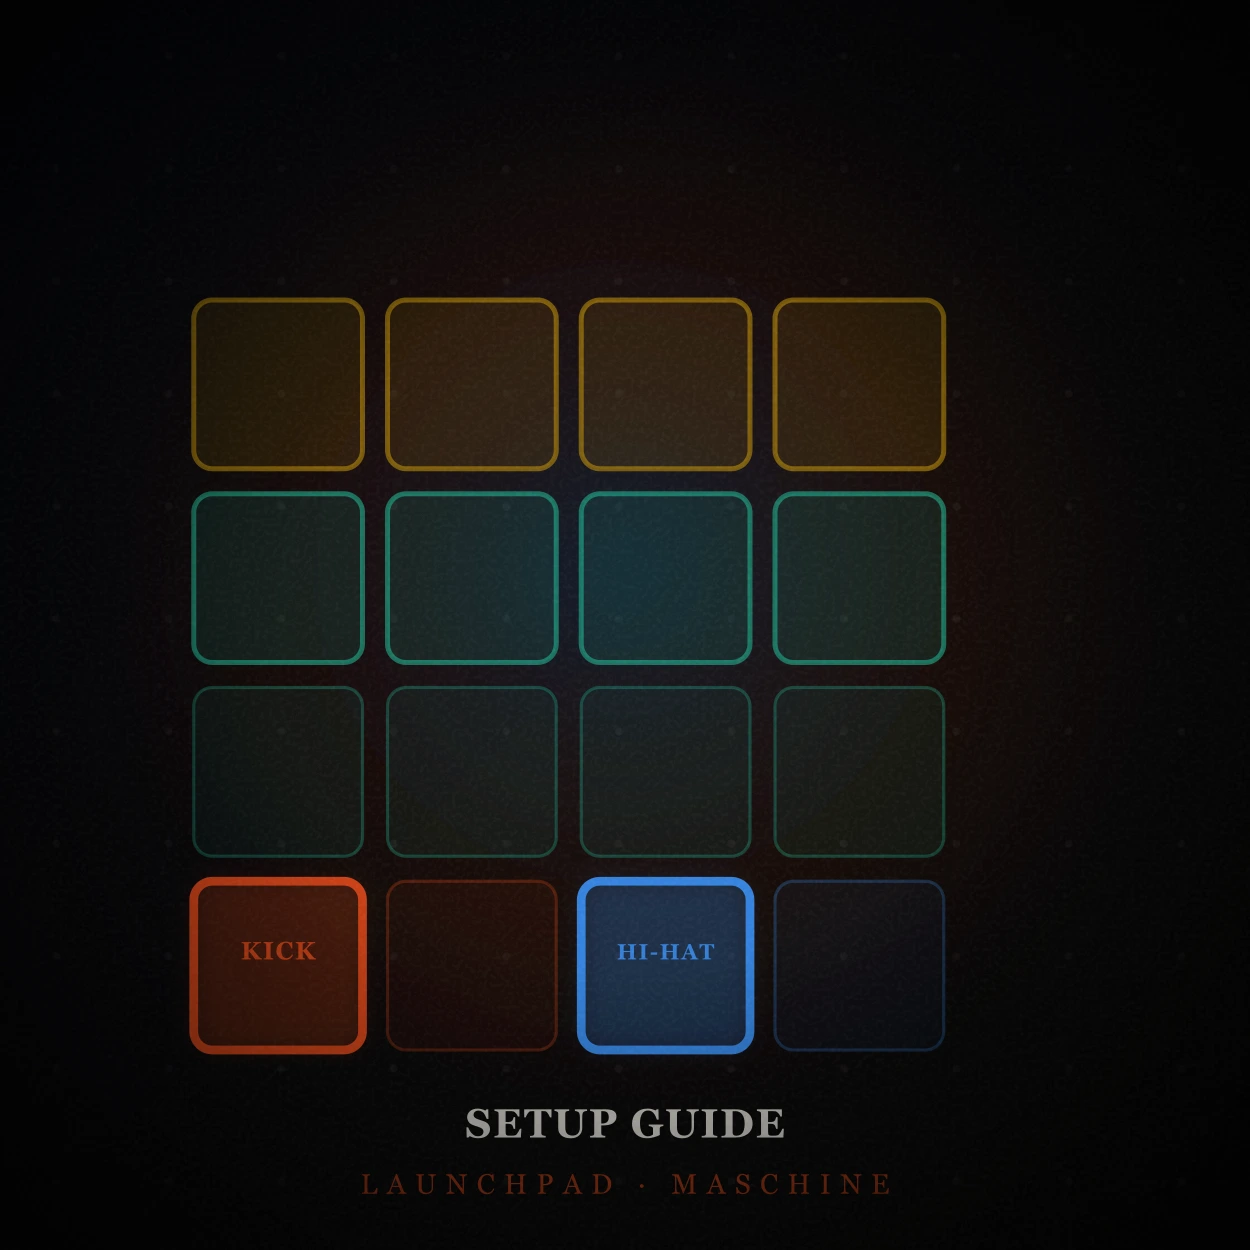
Bottom-left pad — Kick drum. Played with the thumb/first/second of your dominant hand. The thumb is your strongest, most reliable digit. The kick is your most-played hit. These belong together. On Maschine, this is pad 1 (bottom-left of the 4×4). On an 8×8 Launchpad, it is the bottom-left pad of whichever 4×4 quadrant you assign to drums.
Bottom-right pad — Hi-hat. Index finger. Your two most-used sounds on adjacent pads on the same row — your dominant hand stays anchored to the bottom row without crossing.
Middle two rows — Snare/Tom zone. Middle finger or index finger of your non-dominant hand. The snare sits in the centre of a physical kit; it sits in the centre of the pad layout. This is not arbitrary — it makes the spatial logic of a drum kit readable to your hands before you are conscious of it.
Top row — Additional sounds. Cymbals, crash, one shots, hits. These fire less frequently and sit furthest from your resting hand position, so reaching for them costs less than it looks on paper.
This Launchpad finger drumming layout and Maschine finger drumming layout applies whether you are on a 4×4 or 8×8 grid. On an 8×8 Launchpad, use only the bottom-left 4×4 quadrant to start. Expanding is a Month 2 decision. The beginner exercises guide is built around this layout — if you use a different zone assignment, the hand positions in those exercises will not transfer.
Sound Selection — One Kit, Every Session
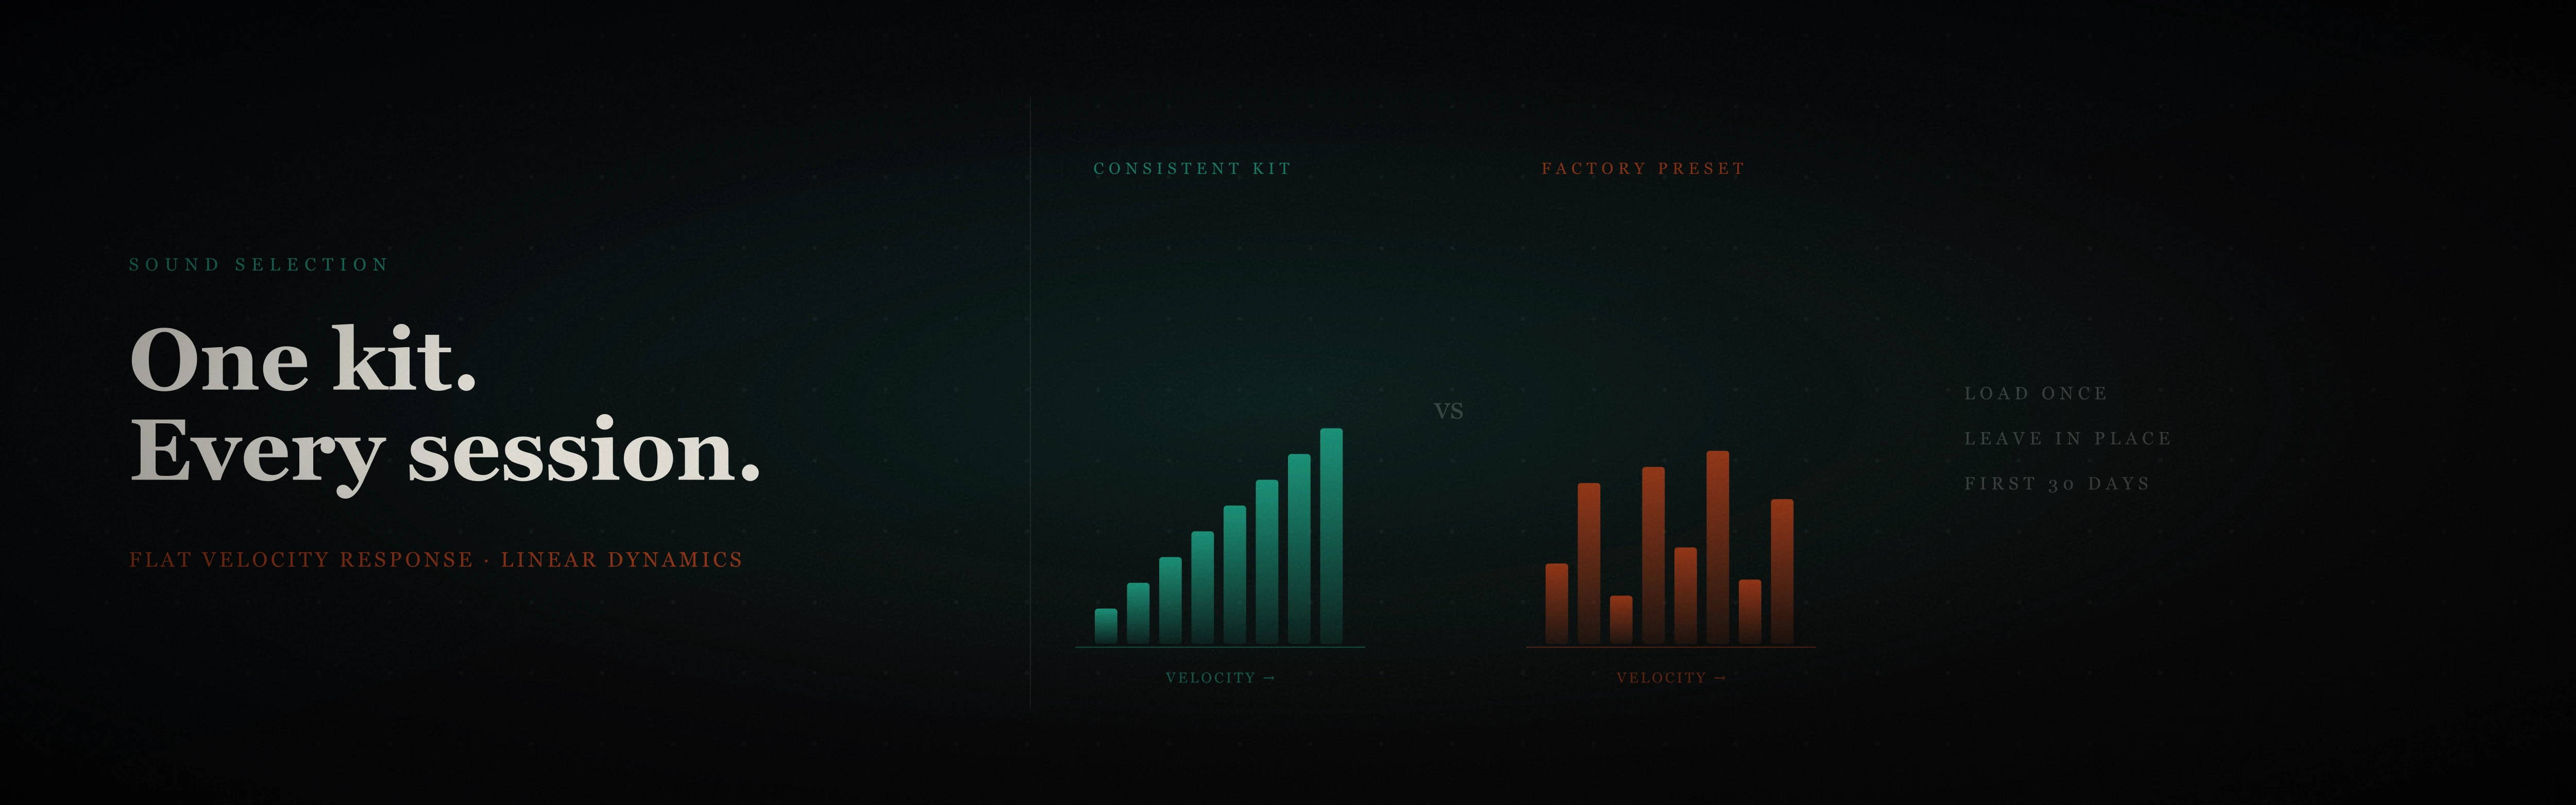
Sound choice in any Launchpad or Maschine finger drumming setup comes down to one rule: use the same kit every session.
Not because variety is bad. Because your hands are calibrating their striking force to the velocity response of specific samples. Change the kit and you change the velocity curve. What felt like a consistent ghost note yesterday becomes an accidental full accent today. Your ears are not hearing better playing — they are hearing a different instrument with different physics.
Avoid factory presets. Factory kits on both Launchpad and Maschine are built for demos, not for practice. They frequently have inconsistent velocity response across pads and are mapped to cover a wide range of styles rather than one cohesive sound. Inconsistent response is the enemy of deliberate practice — you cannot tell whether a mistake is your technique or the preset.
Use a practice kit with flat, linear velocity response across every pad. The free Finger Drumming Fundamentals pack includes 16 samples selected specifically for this — the same sounds used in the pad player exercises. Load them once and leave them in place for the first month. The goal right now is calibrating your hands, not exploring timbre.
Maschine and Launchpad DAW Setup
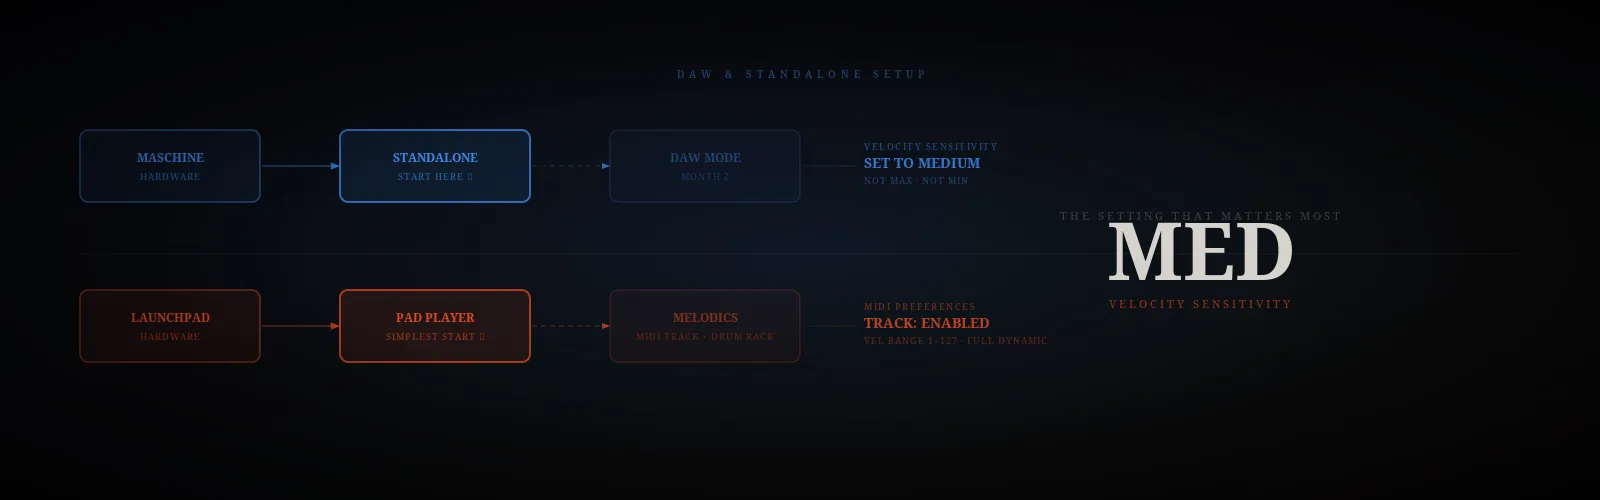
Maschine finger drumming setup — standalone vs DAW mode. If you are starting out, use standalone mode. Maschine standalone launches faster, needs no DAW configuration, and removes one troubleshooting layer when something sounds wrong. In standalone mode, create a Group, load your kit, and assign pads to the finger drumming layout above. Pad assignments persist between sessions without any extra work.
DAW mode — routing Maschine as a VST inside Ableton, Logic, or similar — becomes relevant when you want to record grooves into a session or layer them with other instruments. That is a Month 2 problem. Do not add complexity to a setup you are still calibrating.
One critical setting in both modes: velocity sensitivity. Set it to medium to 90%. Maximum sensitivity makes quiet hits nearly inaudible and produces uneven response across the velocity range until your technique is consistent. Minimum sensitivity turns the pad into a binary on/off switch with no dynamic range. Medium gives you full dynamics without requiring precise striking force before your hands have developed it.
Launchpad finger drumming setup — Melodics vs Ableton Live. If you want the fastest and most controlled start, use PadPlayer (included in the Finger Drumming Fundamentals & Genres Pack). It’s a standalone environment built specifically for finger drumming, with pre-mapped layouts, consistent velocity response, and no DAW or MIDI routing required. Load it, connect your controller, and you are ready to practice immediately with the exact layout used throughout this guide.
Melodics is a solid alternative if you prefer a gamified learning experience with guided exercises and feedback. However, it introduces its own structure and mapping logic, which may differ from your long-term setup. It can also encourage longer screen-focused sessions, which is something to be mindful of — especially early on. We’ll break this down in more detail in future posts.
Ableton Live is the most flexible option, but also the most complex. Route your Launchpad MIDI to a drum rack, assign samples manually, and verify velocity range settings (min 1, max 127) for full dynamic control. This is best introduced once you start recording ideas or integrating finger drumming into full tracks.
Your First 10 Minutes — The Diagnostic
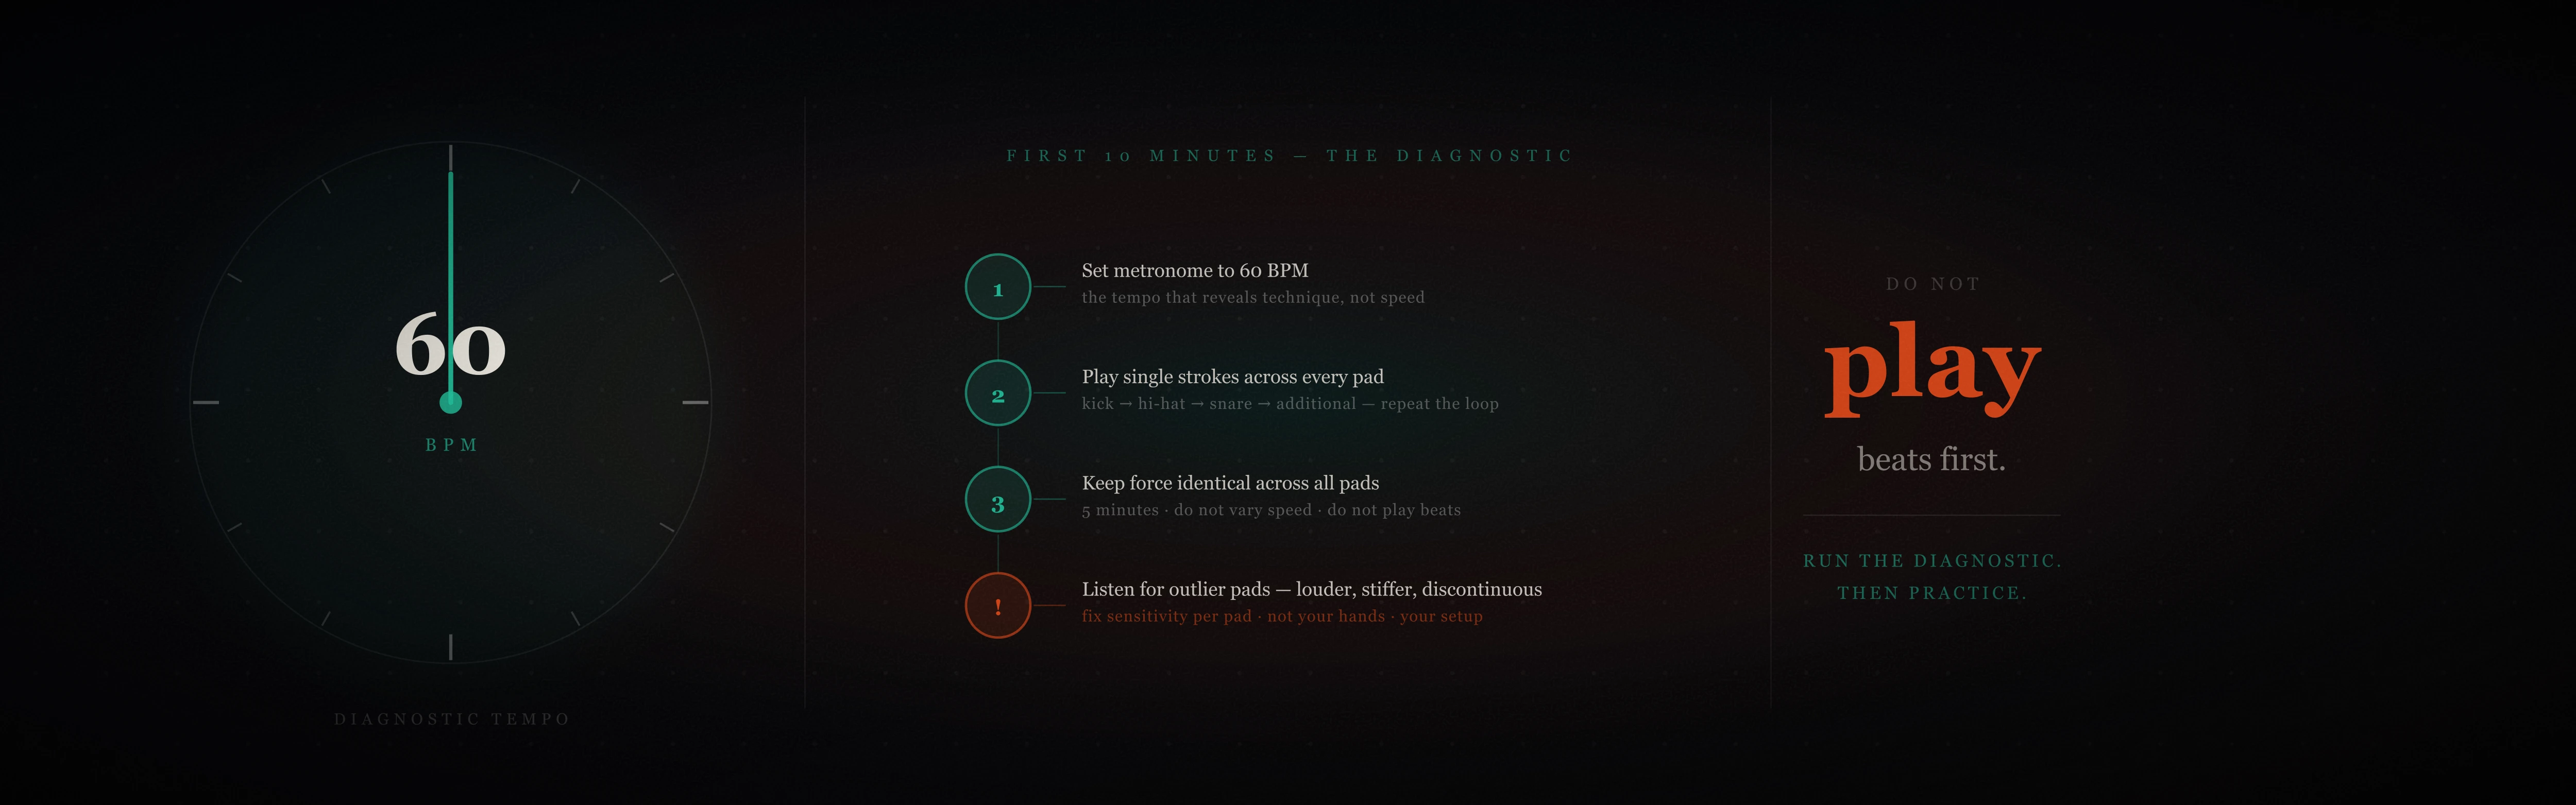
Do not start playing beats. Not yet.
The first 10 minutes after completing your Launchpad or Maschine finger drumming setup should be a diagnostic, not a performance. Set your metronome to 60 BPM. Play single strokes — one hit per pad, evenly spaced on the beat — across every assigned pad in sequence. Kick, hi-hat, snare, each additional sound. Repeat the loop for five minutes at the same tempo without varying your force or speed.
This is what you are listening for: a pad that consistently fires louder than the others at the same striking force. A pad that feels stiffer or softer than its neighbours. A hit that changes in tone between quiet and loud touches in a way that feels discontinuous rather than gradual. These are not your technique — they are your setup telling you what needs adjustment.
If one pad consistently fires louder at the same force, its velocity curve is miscalibrated. Adjust the sensitivity for that specific pad rather than the global setting. If a hit changes timbre discontinuously at a certain velocity, you may have multiple samples layered unevenly in the velocity map. Fix these now rather than practicing around them for six weeks and attributing the inconsistency to your hands.
The 15-minute practice routine for beginners starts exactly here — five minutes of single strokes are built into the warm-up for this reason. If your setup passes the diagnostic, you are ready to begin the routine on day one.
Where to Go Next
Your Launchpad or Maschine finger drumming setup is now correct: the layout mirrors the physical drum kit, your kit has consistent velocity response, your DAW or standalone mode is routed and calibrated, and every pad has been verified with the single-stroke diagnostic.
The next step is structured practice from day one rather than exploring the hardware and hoping something clicks. The 15-minute beginner routine gives you the daily structure. The first five exercises use the exact pad layout above — each drill maps directly to the zone assignments you have just configured. If you want to know what the first month of practice looks like, the 30-day progress guide documents it week by week.


Related
- 15-Minute Finger Drumming Practice Routine
- 15-Minute Finger Drumming Practice Routine
- Week 1 — First Week of Finger Drumming
- Week 2 — Warm-Up and Beginner Beat Patterns
- Rudiments Part 1 — Core Exercises
- Intro to Metronome Exercises - Train Your Inner Pulse
- Realistic Finger Drumming Groove Series
The setup takes 20 minutes. The muscle memory it builds lasts as long as you play. Get it right once, before the habits set.
— ToneSharp