Affiliate Disclosure: This post contains affiliate links. If you buy something through one of these links, I may earn a small commission at no extra cost to you. I only recommend gear I have actually used or would genuinely buy myself.
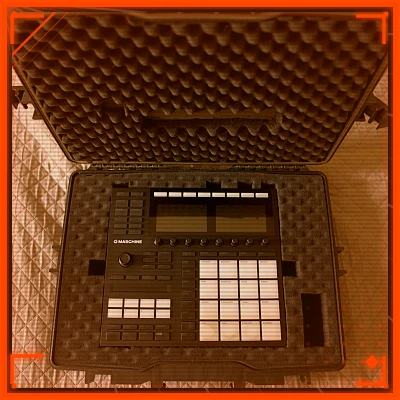
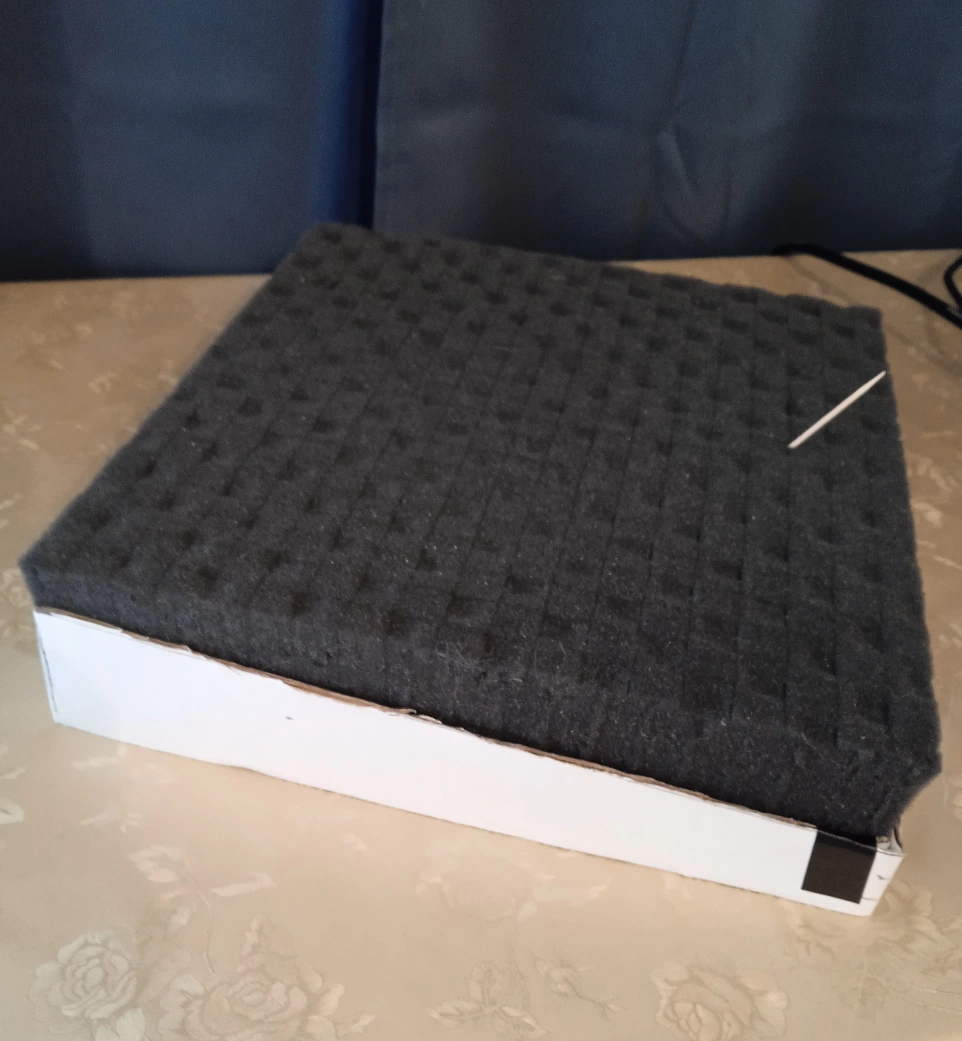
Traveling with the Maschine MK3 is a low-key nightmare. Soft gig bags are better than nothing, but one bad knock and you are holding your breath hoping the encoders survived. Official hard cases and premium pre-made options exist, but the price tags are hard to swallow for something you use a few times a year.
So I built my own. In this post I'll show you exactly how I turned an ordinary hermetic tool case into a custom fortress for the MK3 — including a cardboard mold trick for perfectly matching the controller's angled profile. The whole foam job took about an hour and since making the case, it has been through a few trips of over 3 hours each in less-than-ideal road conditions. It even survived having the stand tray tightly strapped on top of it with a bungee cord, adding extra weight and pressure, which definitely wasn't ideal.
What's Inside This Guide
- Why You Need a Hard Case
- Materials and Tools
- Step 1 — Positioning the MK3
- Step 2 — Marking the Outline
- Step 3 — Creating the Base Cutout
- Step 4 — The Angled Cut Template (The Secret Sauce)
- Step 5 — Sawing the Angle
- Step 6 — Test Fitting and Refinement
- Step 7 — Adding Cutouts for Access and Knobs
- Step 8 — Final Padding Adjustments
- The Final Result and Field Test
Why You Need a Hard Case
Let’s be quick about this because you already know. The MK3 has exposed encoders, a glass-smooth surface, and a pair of screens that do not respond well to pressure. Soft bags compress. Backpack corners find a way. And if you are travelling to a gig or a studio session, the last thing you want is to open your bag and find a cracked knob or a dead pixel.
Official pre-made options like the Musiin Premium Velvet Hardshell Case, GEEKRIA Analog Device Case, or the ANALOG CASES and Odyssey DJ Case are genuinely excellent — bomb-proof, well-designed, and worth every cent if you want zero hassle. But some of them are not cheap, and for a lot of us the DIY route makes more sense.
Spending an afternoon on this build cost me a fraction of any pre-made option, gave me a result tailored exactly to the MK3’s dimensions, and — honestly — was a satisfying afternoon project. Let’s get into it.
Materials and Tools

The most important thing to say up front: the brand of the case does not matter. For this build I used a YATO tool case because it was what was available to me locally. You could use an Apache, a Meijia, an Amazon Basics, or a Pelican and follow every step of this tutorial without changing a thing. All that matters is the internal dimensions.
Target internal dimensions: approximately 550 × 438 × 125 mm.
The Case
Pick whichever option fits your budget. Here are a few options at different price points:
- Budget: Waterproof IP67 Laptop Hard Case
- Mid-range: MEIJIA Waterproof Hard Camera Case
- Mid-range (popular): Waterproof Hard Case,Foam-Lined, IP67 Shockproof
- Premium: Pelican 1500 Case With Foam (Black)
Any of those will work. Buy the one your wallet allows.
The Foam
Whatever pick-and-pluck foam comes included in the case. You do not need to buy separate foam — the built-in stuff is exactly what you want for this method.
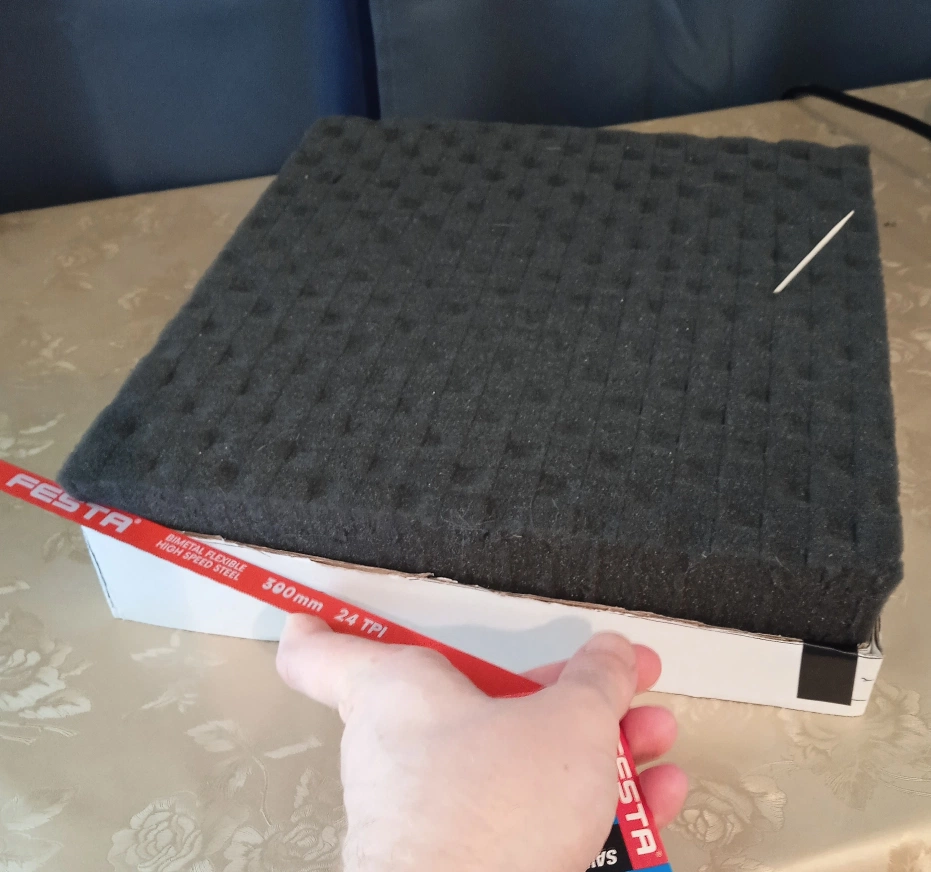
The Tools


- Long-blade utility/parquet knife — a good long-blade utility knife makes cleaner cuts through foam
- Fine-tooth hacksaw blades (replacements) — grab a few, they are cheap
- Tape measure or ruler
- Cardboard (from any old box — this becomes your cutting template)
- Toothpicks
- Patience
Nothing exotic here. The hacksaw blade, utility knife, tape measure, and toothpicks are ready to go. The cardboard comes in later. Keep everything on a clean flat surface and you are set.
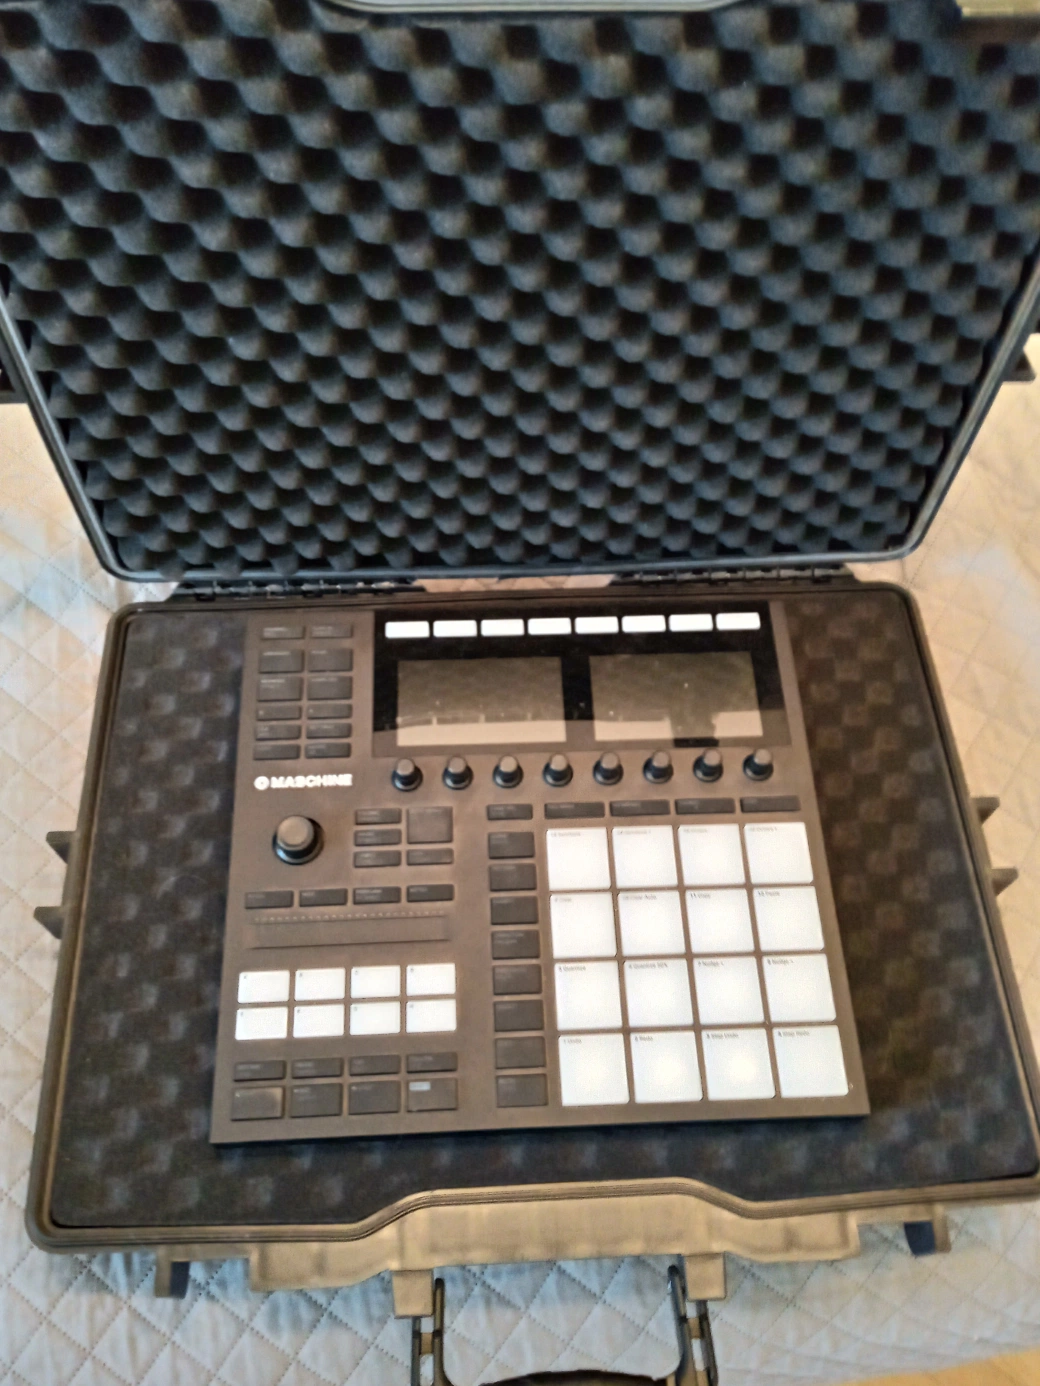
Step 1 — Positioning the MK3

Before you touch a single foam cube, figure out the orientation. This matters more than most guides mention.
Place the MK3 so the screens face toward the hinge side of the case, and the pads face toward the handle/locks side.
This is not arbitrary. The MK3 is heavier toward the back (screen side). Orienting it this way puts the weight toward the hinge, which is the structurally stronger part of the case and keeps the weight distribution stable when you are carrying it by the handle. It also means the cable ports face upward when you open the case, which makes access easier in practice.
Spend a minute confirming this placement looks right before anything else. Once the foam is cut, you are committed.
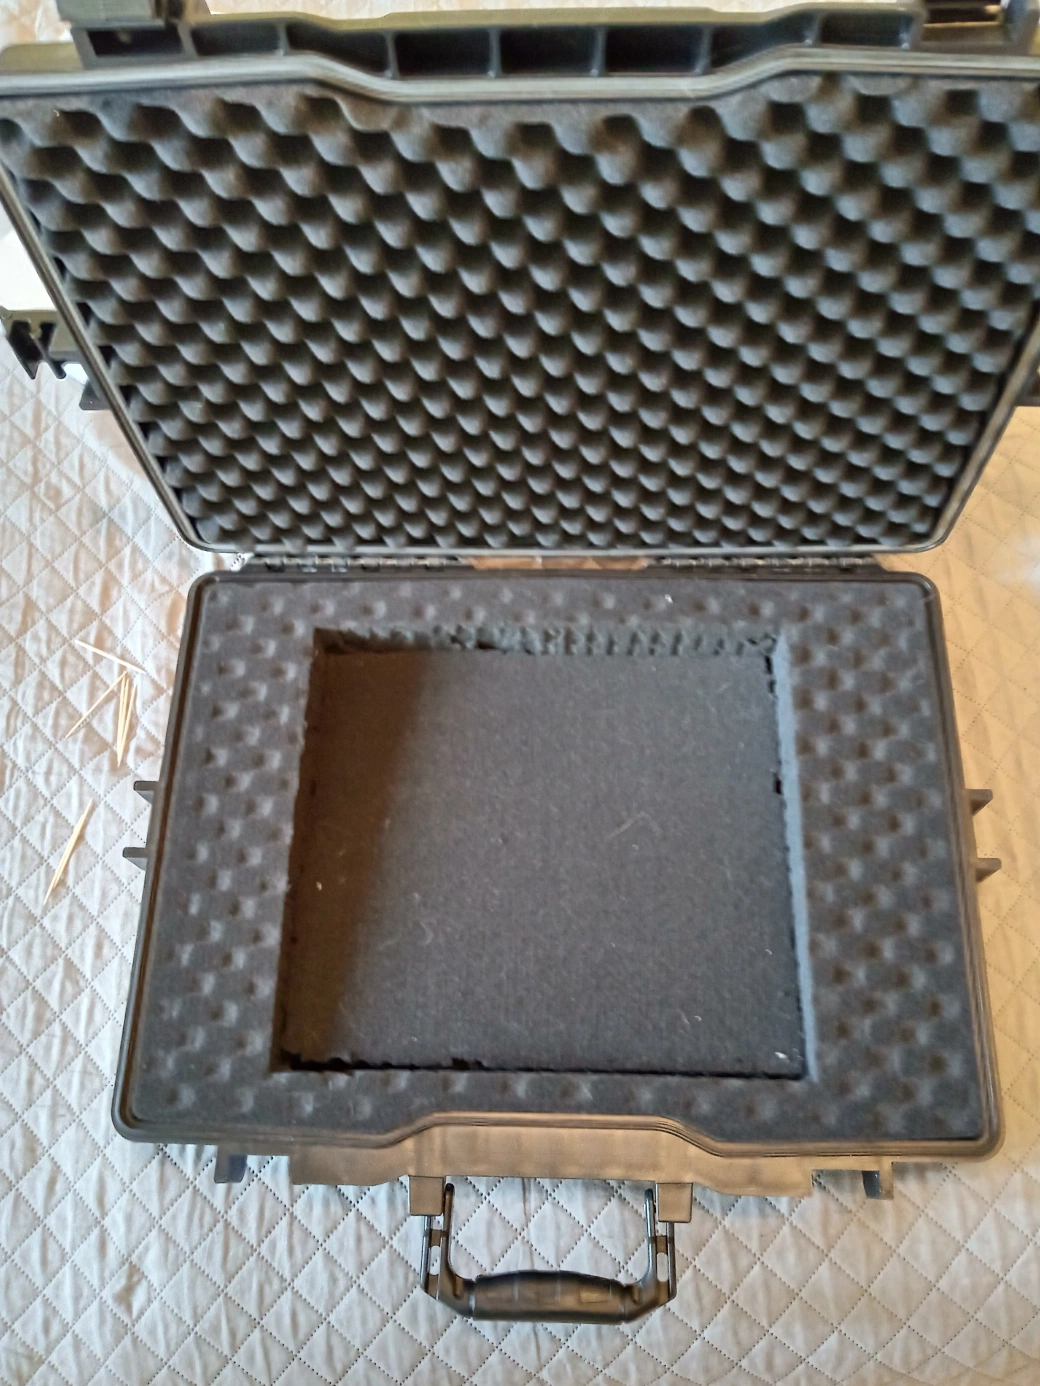
Step 2 — Marking the Outline

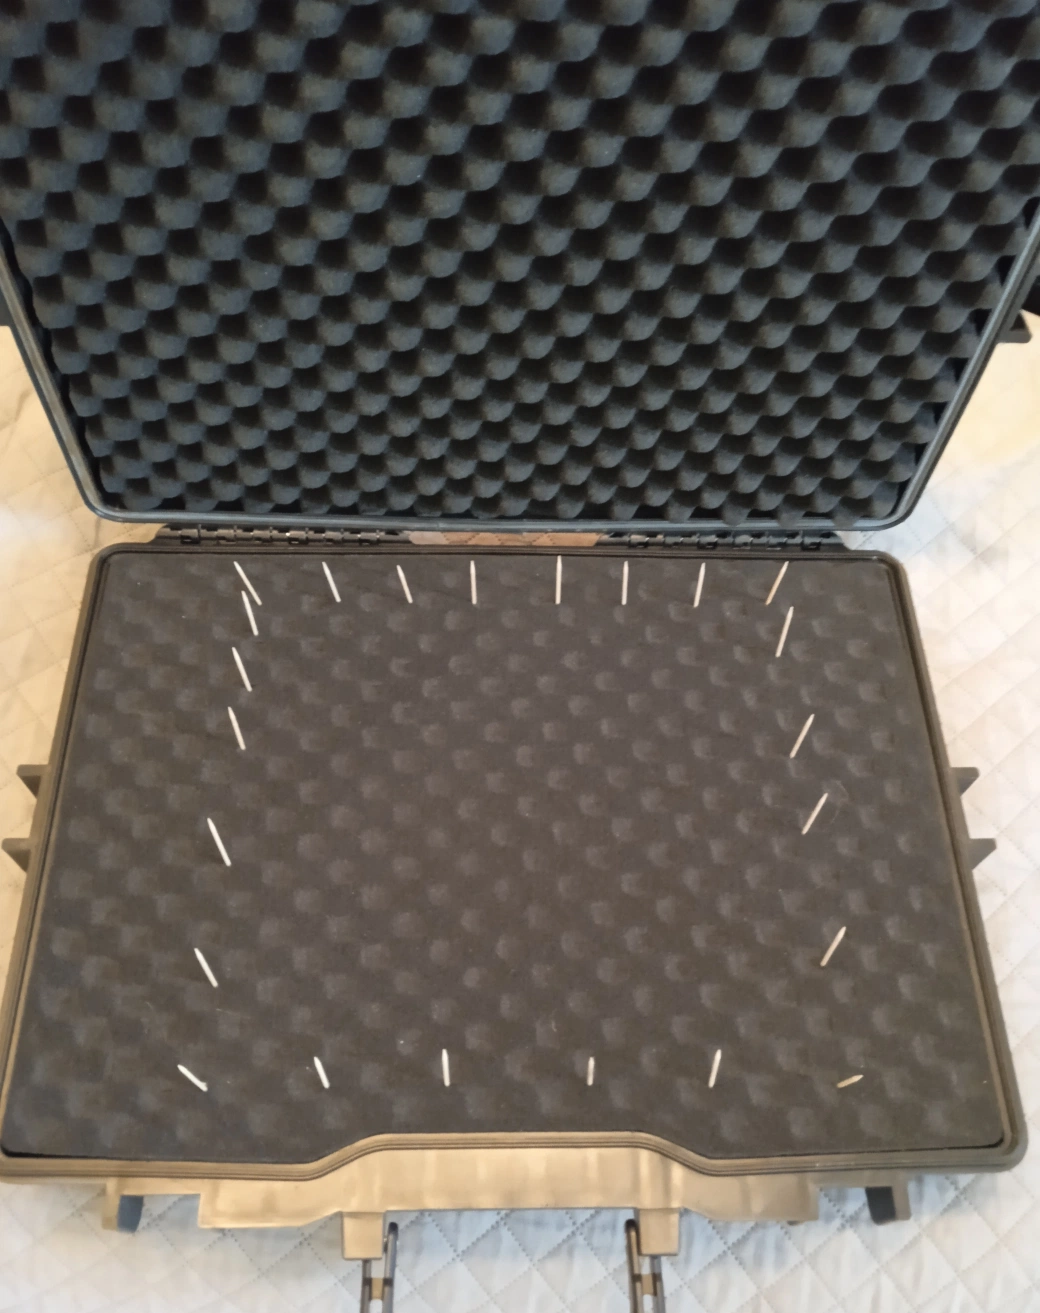
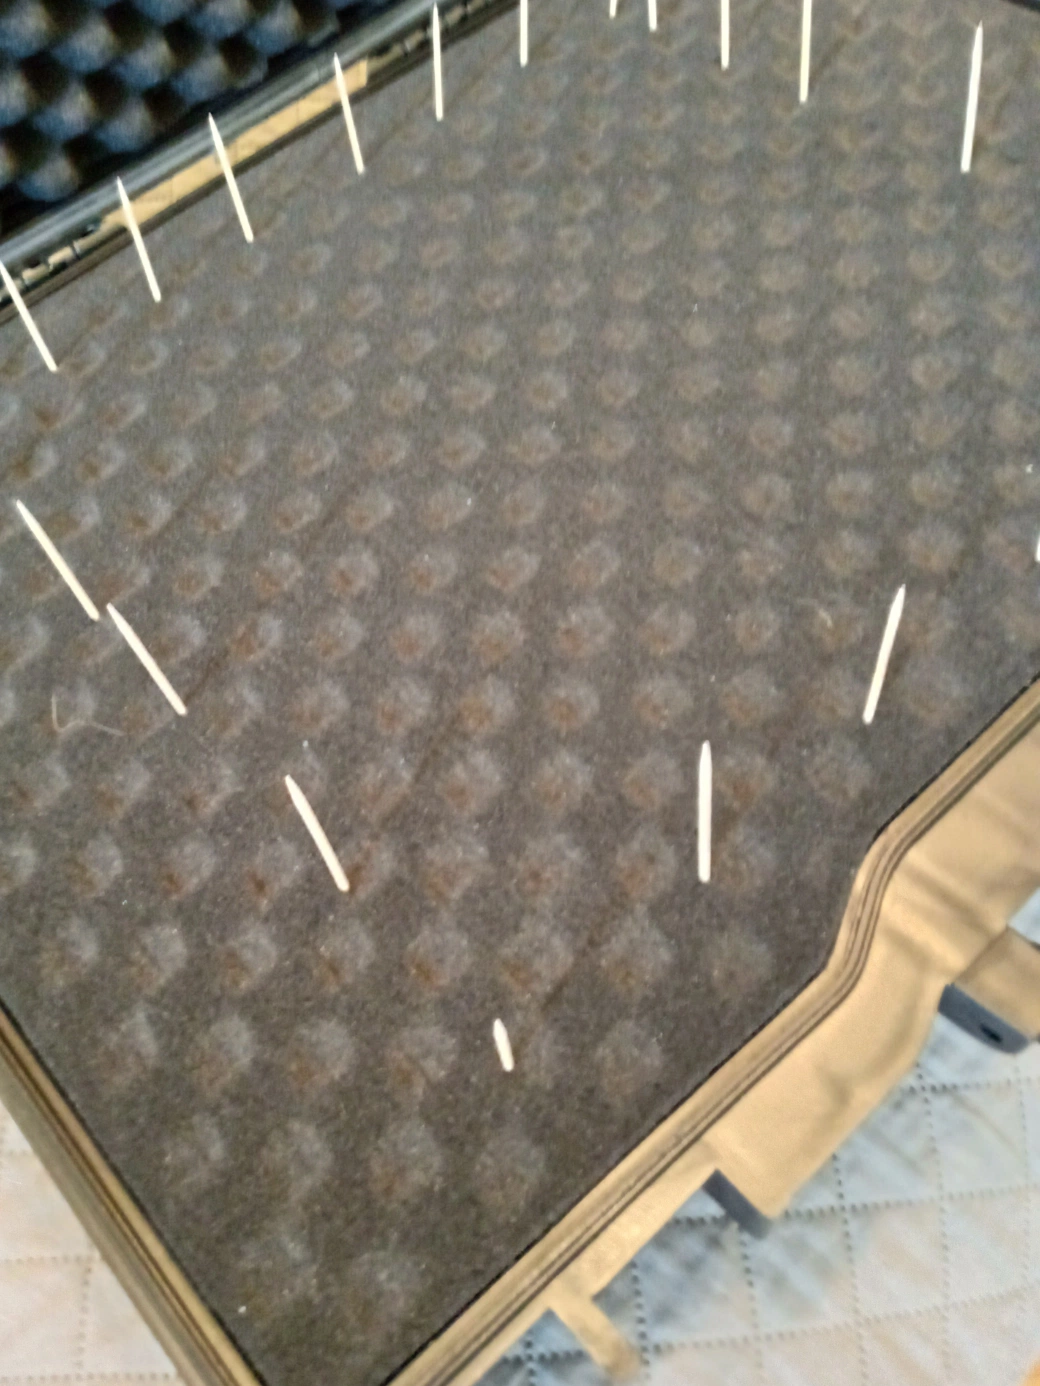
Set the MK3 gently onto the foam in its final position. Now, working around the perimeter of the controller, press toothpicks vertically into the foam right up against each edge. Space them roughly every 3–4 cm.
When you lift the MK3 away, you have a perfect outline of the controller marked in the foam without a single pen mark or ink stain. The toothpicks stay in place and serve as your cutting guide for the next step.
This is one of those tricks that sounds too simple to be useful until you try it. It is genuinely the cleanest way to transfer the outline.
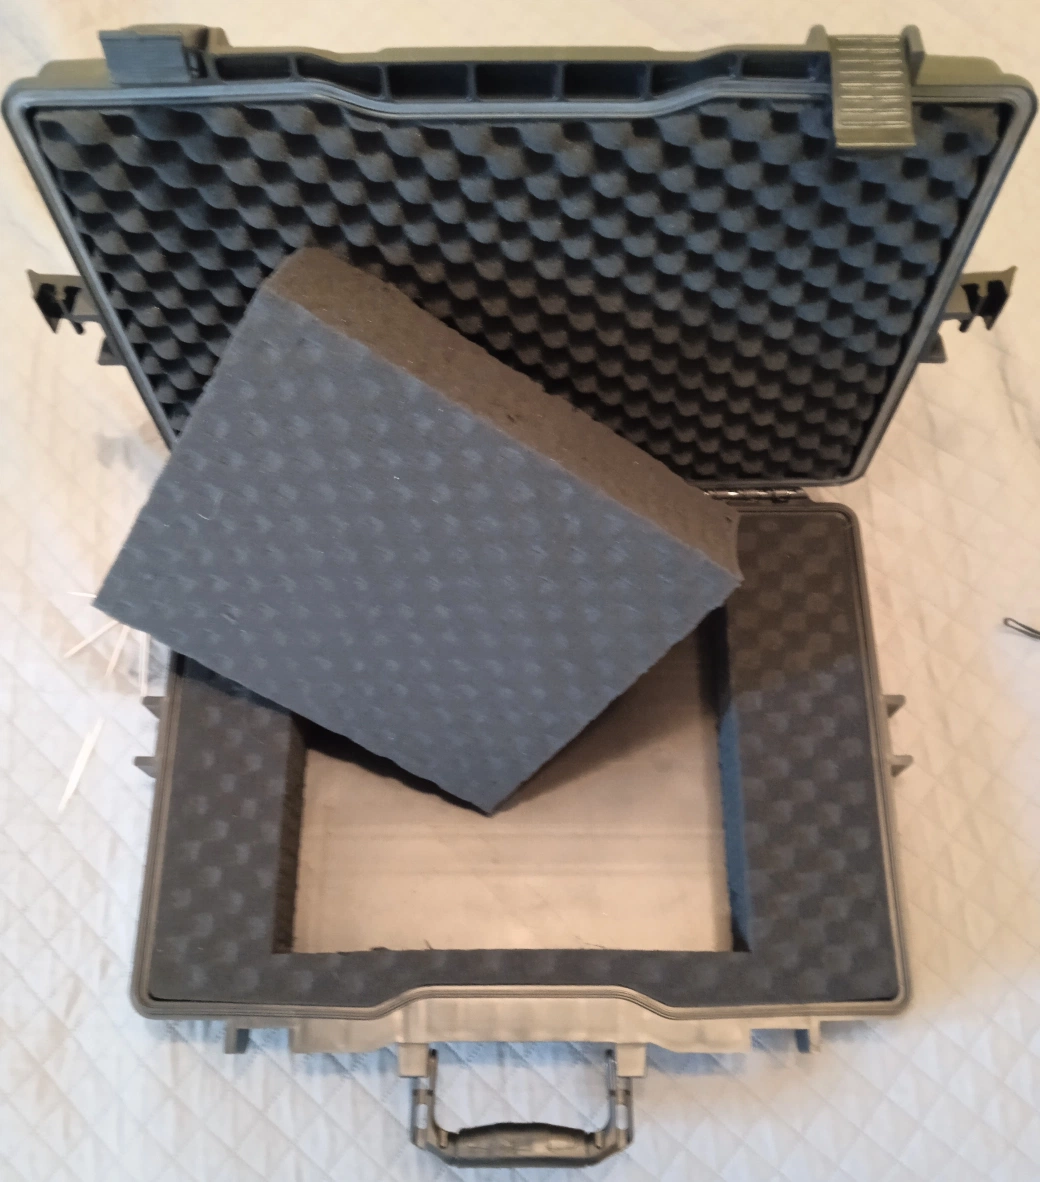
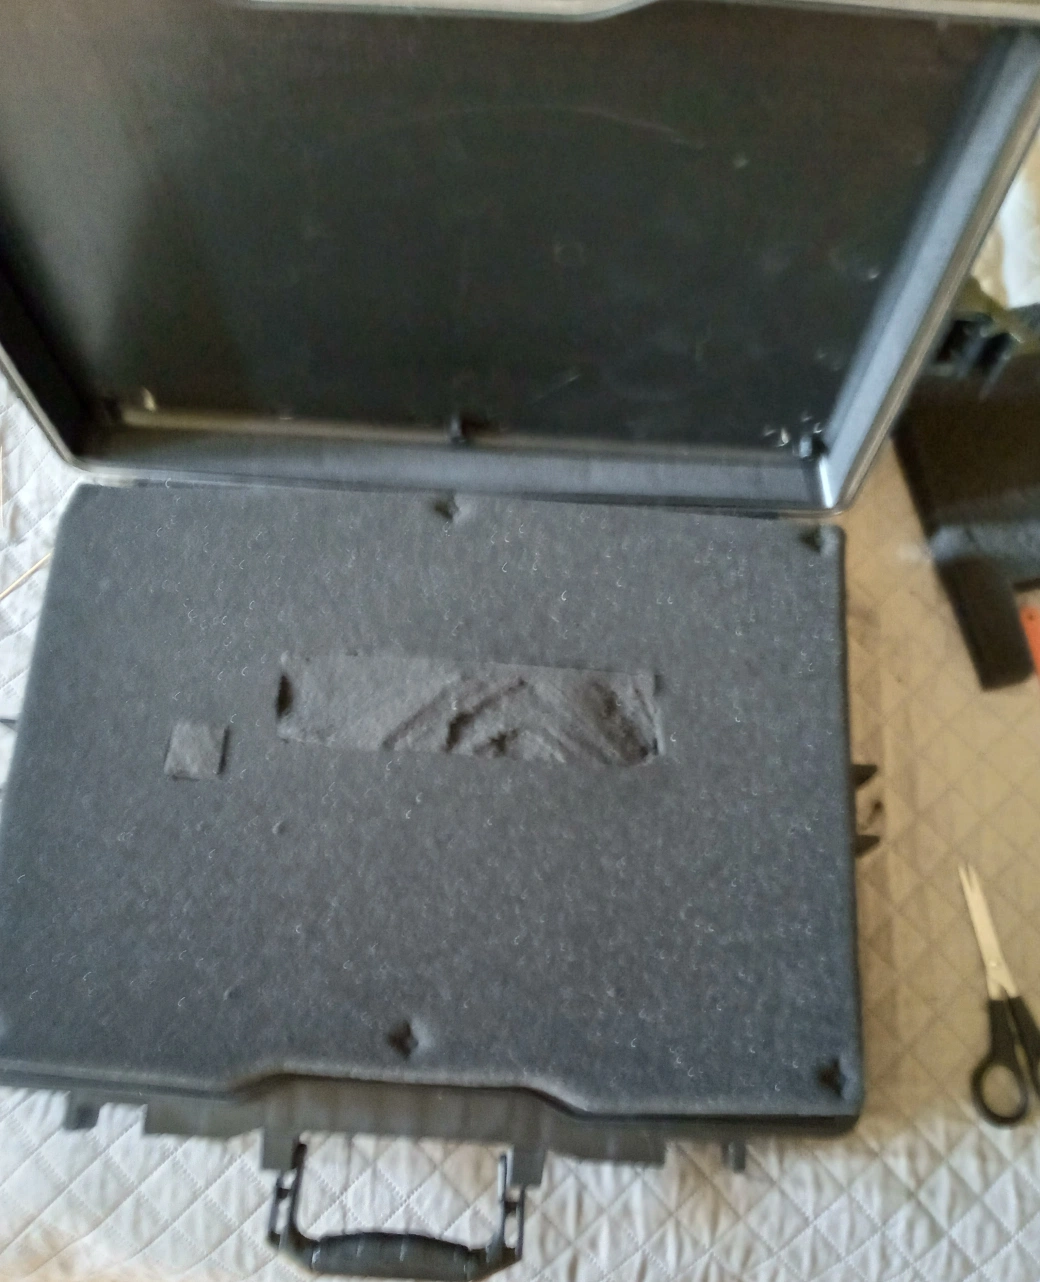
Step 3 — Creating the Base Cutout


Here is where pick-and-pluck foam earns its name. You do not necessarily need the knife for this stage.
Working inside the toothpick outline, try gently separating the foam cubes by hand first. On most pick-and-pluck foam, the cubes detach surprisingly easily — the perforations are designed exactly for this. Work from the centre outward, pulling each cube cleanly away.
For cubes that are stubborn or for tidying up the edges of the outline, use the utility knife. Slow, vertical cuts following the toothpick line. Do not rush this part — a ragged edge here means a sloppy fit later.
Keep the foam block you remove from the centre in one piece. You will need it for Step 4.
Step 4 — The Angled Cut Template (The Secret Sauce)

This is the step that makes or breaks the build — and the one I have not seen explained clearly anywhere else.
The problem: The Maschine MK3 is not a flat block. It slopes. The front edge (pad side) is lower than the back edge (screen side). If you cut the foam flat and drop the MK3 in, the lid will not close properly — it either puts pressure on the controller or leaves a gap.
The solution: You need to cut the foam at an angle that mirrors the MK3’s slope. And you need to do that accurately without a laser cutter or hot wire. Here is how.
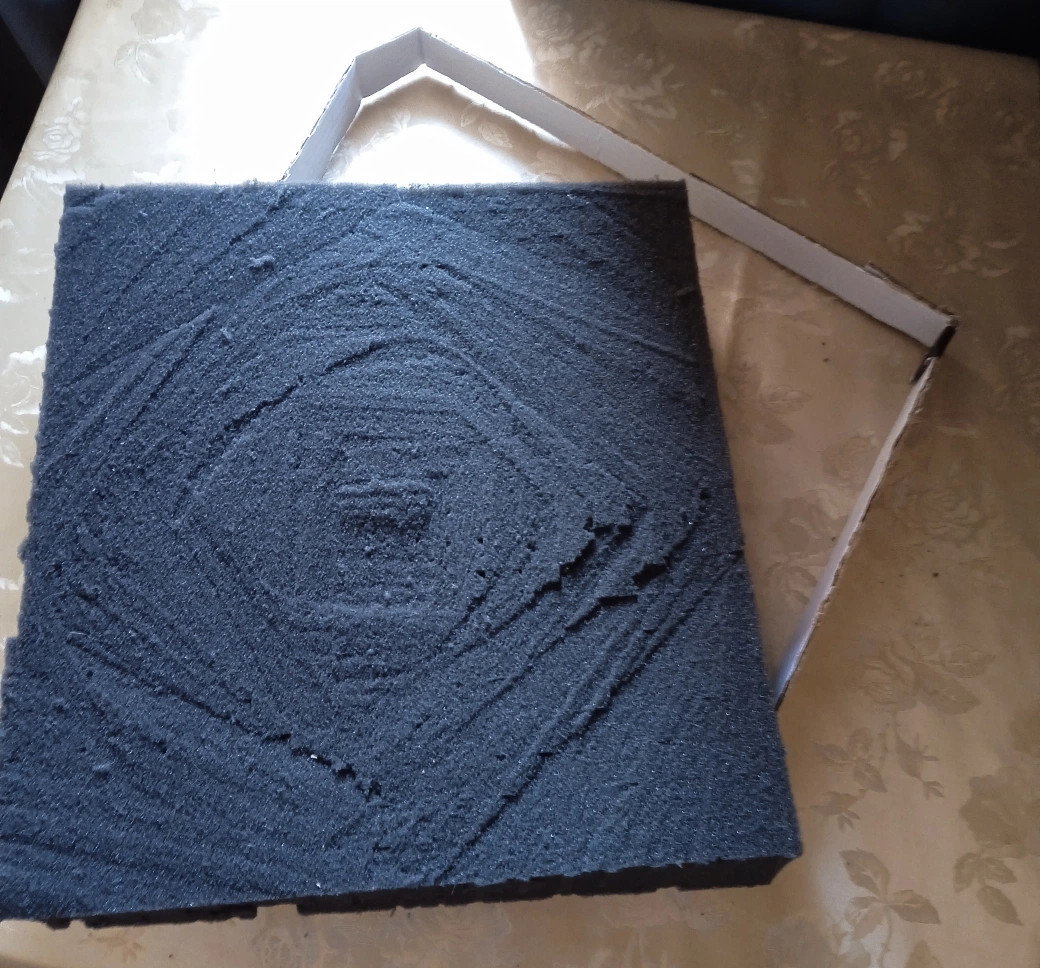
Take the foam block you removed in Step 3. Build a simple open-top box from cardboard that fits snugly around it — like a sleeve or mold. The inside dimensions of the cardboard box should match the foam block exactly so it sits inside without shifting.
Now measure the slope of the MK3. The front edge sits lower than the back edge by a specific amount — measure both heights and calculate the difference. Cut the top edges of the cardboard mold at that exact angle, so one side is taller and the other is shorter, matching the MK3’s slope.
Critical orientation warning: When you place the foam block into the cardboard mold for cutting, it goes in upside down relative to how it will sit in the case. The reason is that you are cutting from the top of the mold, which means the angled cut ends up on the face of the foam that sits inside the case — the surface that the MK3 rests against. If you get this orientation wrong, the slope goes the wrong way. Double-check before you saw.
Step 5 — Sawing the Angle


With the foam block seated in the cardboard mold, rest your fine-tooth hacksaw blade across the angled top edges of the mold. The mold edges are your guide rails — the blade sits on them and slides across, producing a perfectly straight cut at the correct angle.
A hot wire cutter would be ideal for this step if you have access to one. The hacksaw blade works just as well; it just requires a steadier hand and a bit more patience.
Technique: Do not try to cut all the way through in one pass along one side. Start at a corner, take a few strokes, then move to the opposite corner and take a few strokes there. Work progressively from side to side so the cut stays even across the full width. Rushing this produces a wavy cut that will not sit flat.
Save the wedge you cut away — the tapered offcut from this step. It comes back in Step 8.
Step 6 — Test Fitting and Refinement

Place the angled foam block back into the case cutout. Set the MK3 in. Close the lid.
Chances are it will not close cleanly on the first try. That is completely normal — it took me several attempts. The angle needs to be within a very small tolerance to work, and foam compresses slightly in ways that are hard to predict.
If the lid closes but feels like it is pressing hard on the controller, your angle is still too steep — the foam is too thick on the high side. Pull the foam back out, shave a small amount off the high edge using the hacksaw blade, and test again. Repeat until the lid closes with light, even contact — secure enough to hold the MK3 firmly, not so tight that you are putting real pressure on the encoders or screens.
This is the most iterative part of the build. Do not skip the test fits.
Step 7 — Adding Cutouts for Access and Knobs

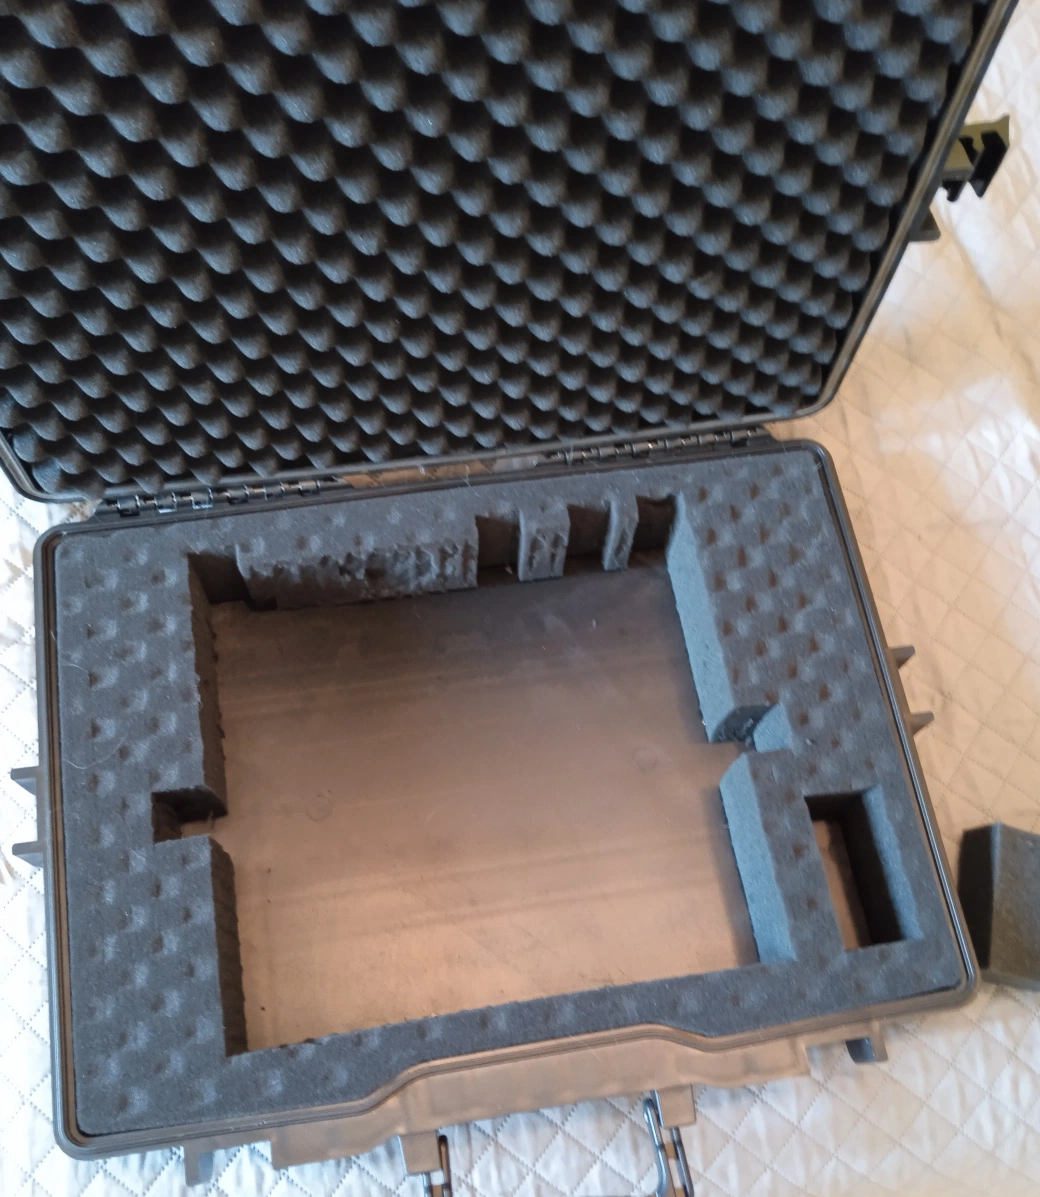
Once the fit is dialled in, you will discover a new problem: the MK3 is now extremely difficult to get out. A snug foam cutout with no handholds is impressively grippy.
Fix this by cutting a small relief notch on each side of the cutout — just enough to get two fingers under the controller. A simple rectangular cut with the utility knife is all you need. You are not trying to make the cutout loose, just giving yourself a grip point.
While you are at it, address the potentiometers (the knobs on the MK3’s surface). On a flat foam cutout, the knobs get compressed when the lid closes — not ideal over time. Use the utility knife to cut a rectangle for the potentiometers to sit in. If you can make smaller cutouts for each individual knob, good for you; however, I went with a rougher method and just made one big window. The knob sits into the relief and is no longer compressed by the foam surface.
Step 8 — Final Padding Adjustments

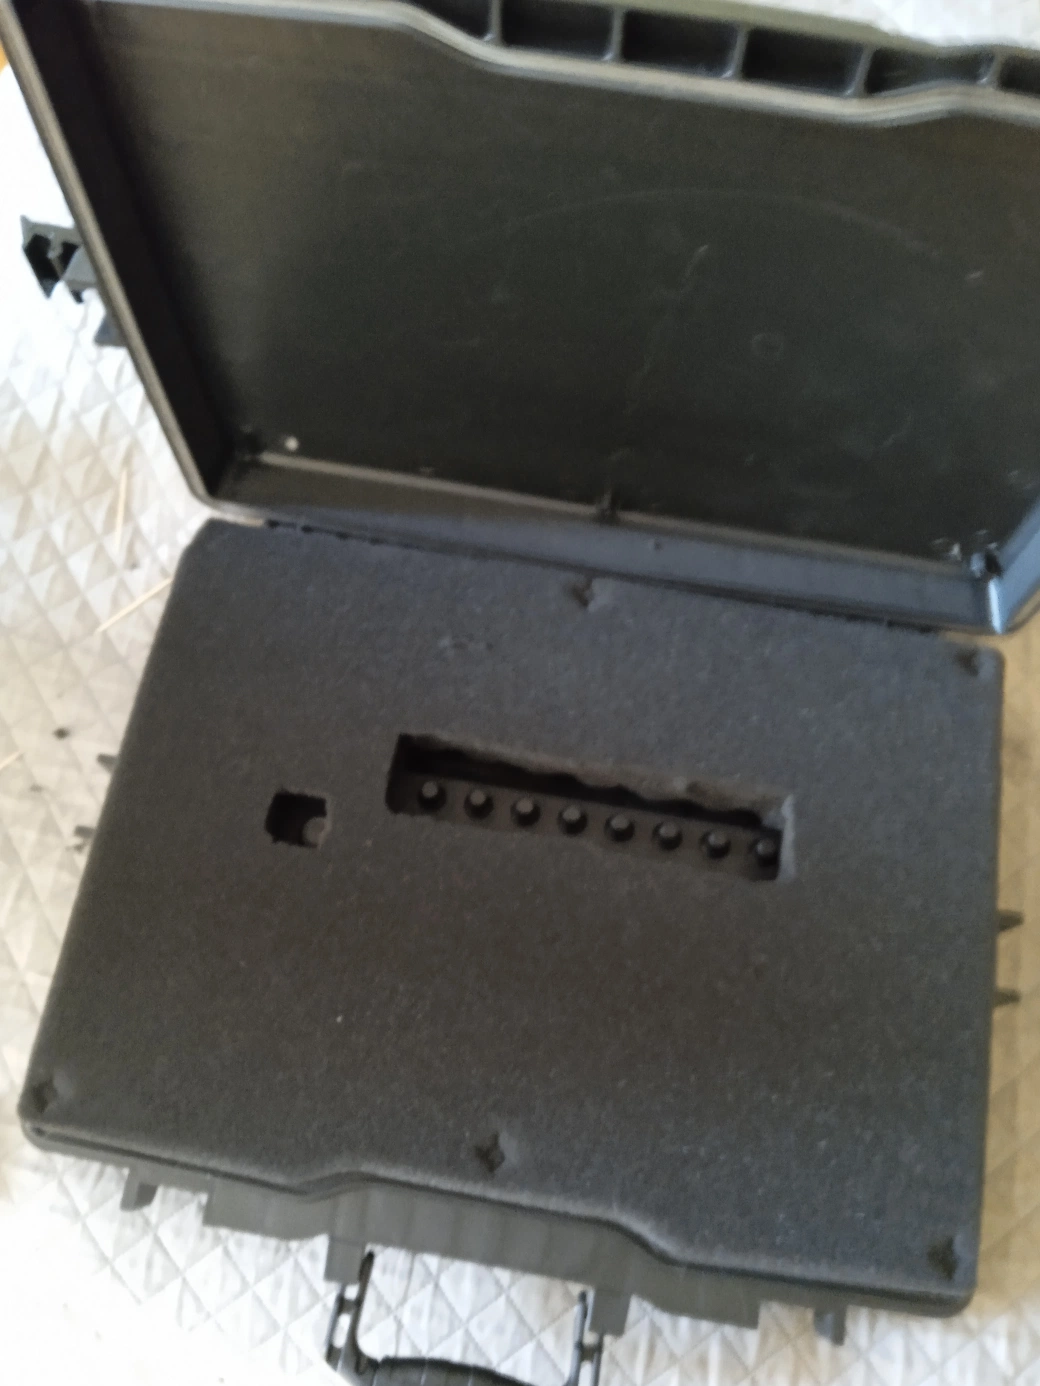
Two finishing touches that make the case genuinely secure rather than just functional.
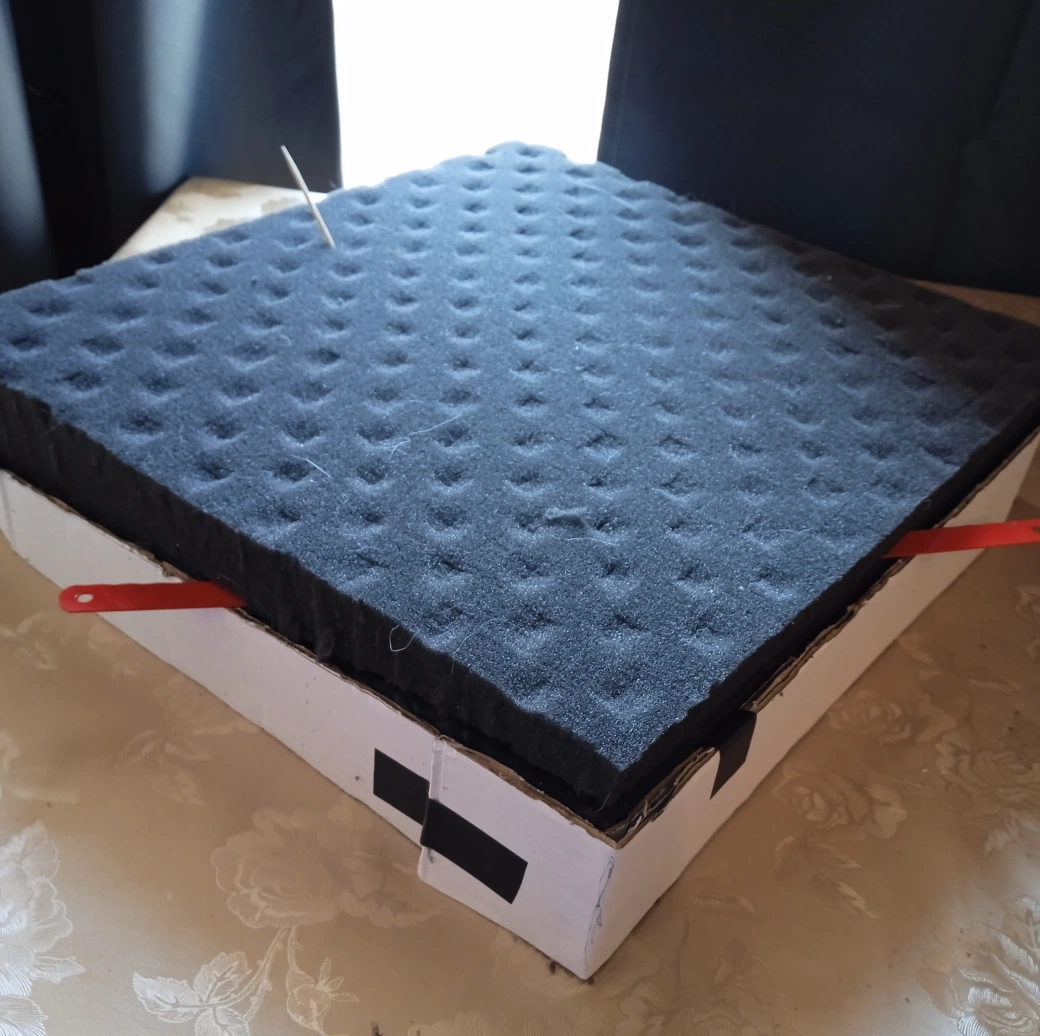
Back padding: Remember that foam piece you just cut out for the potentiometer ‘window’? Take it, split it down the middle, and use it to fill the gap on the outside toward the lid. It takes a piece of material that would otherwise be bin fodder and turns it into structural padding — satisfying on multiple levels.
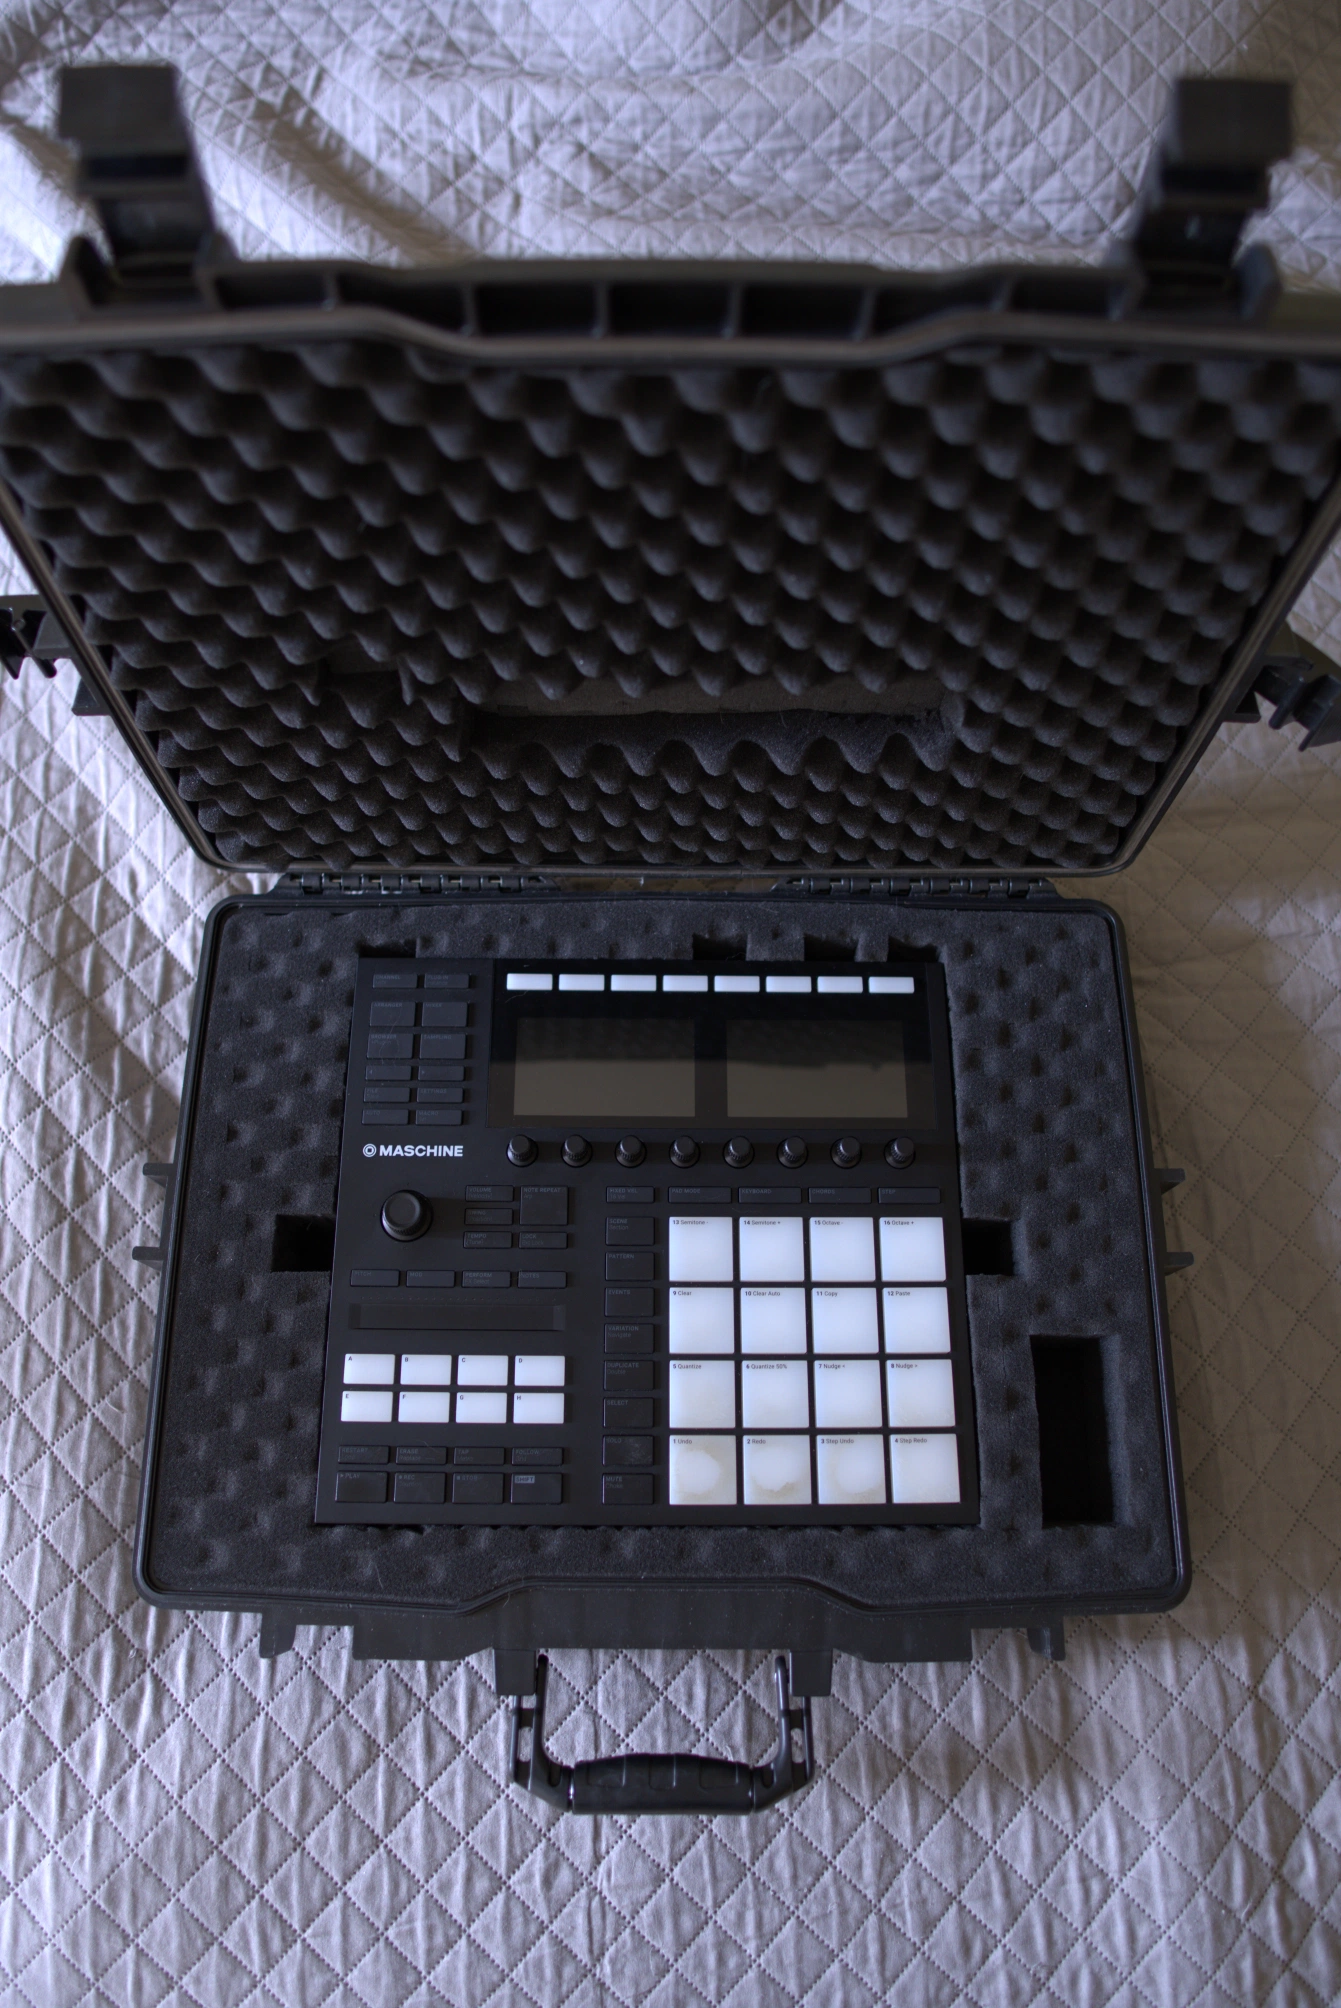
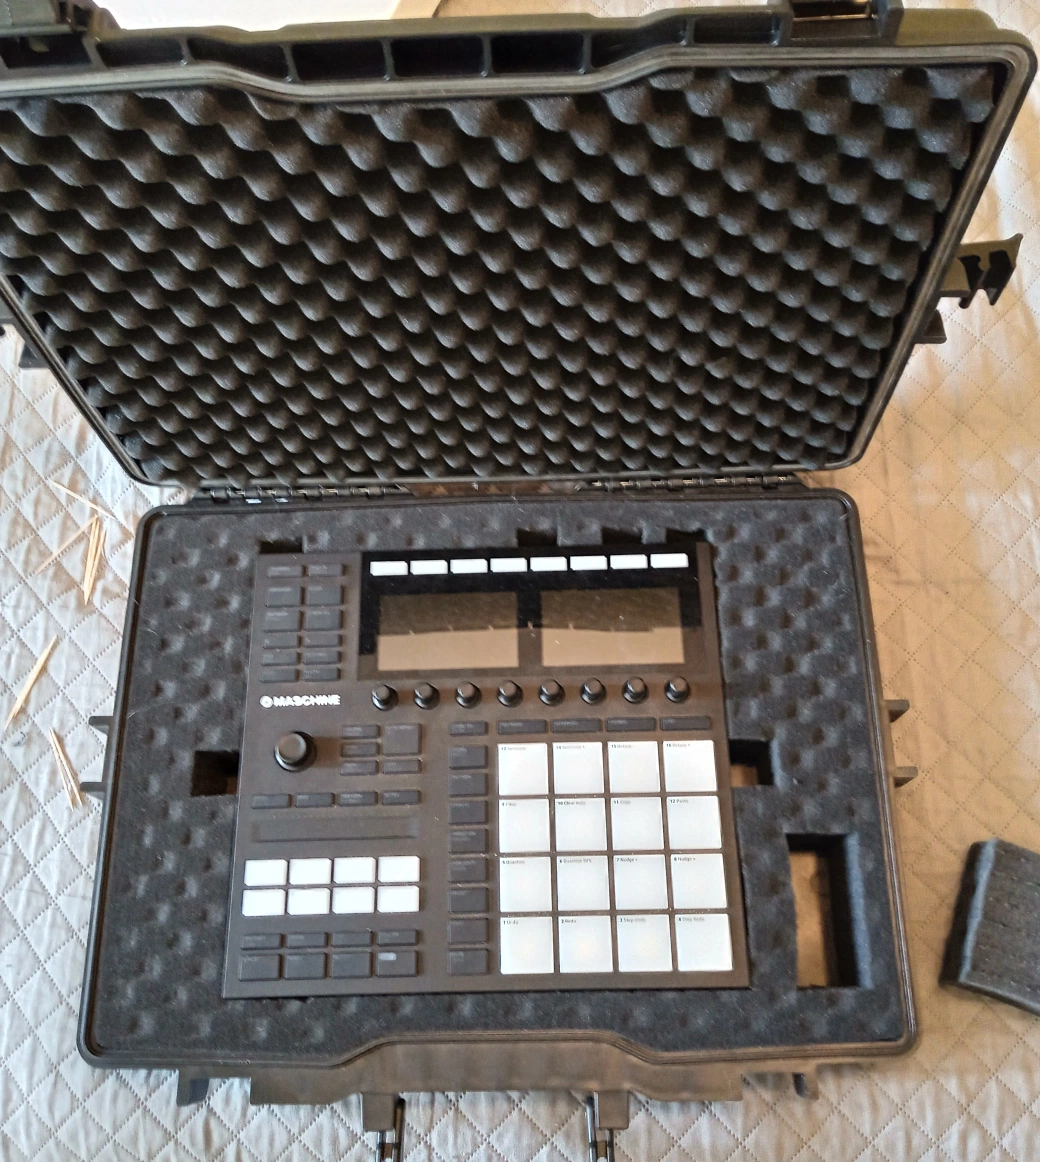
The Final Result and Field Test

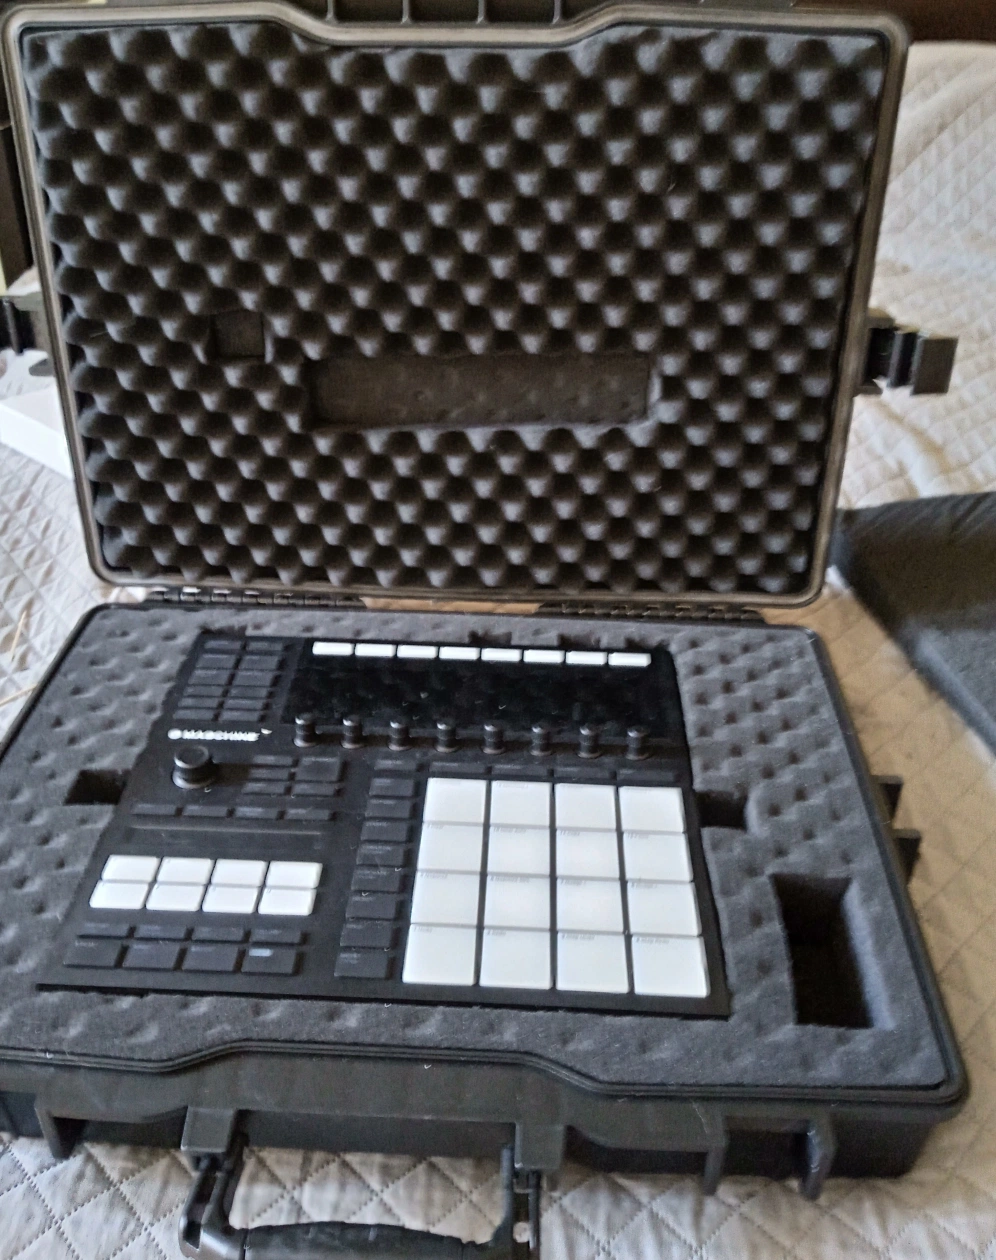
The foam work from start to finish took about an hour, including all the test fitting iterations.
The real test came a few days later: a 4-hour drive on genuinely rough roads, with a stand strapped tightly to the outside of the case. I will be honest — I was paying attention every time we hit a pothole. Not a scratch, not a shifted component, encoders all moving smoothly.
I have not thrown it in water or driven a car over it, and I am not going to. But given the weight of the case, the snug foam fit, and the quality of the latches on most hermetic tool cases, I am completely confident this protects the MK3 under any realistic travel scenario. Normal touring, flying as checked luggage (with appropriate foam density), session travel — this handles all of it.
Conclusion
The total cost for this build was the price of the case itself. If you already have cardboard, a utility knife, and any hacksaw blade around the house, you are not spending anything beyond that. The result is a case fitted exactly to the MK3’s dimensions and profile — including the slope that most generic cases ignore entirely.
The angled foam mold trick is the part I had to figure out the hard way. Hopefully this saves you the trial and error.
If you build your own version of this, I would genuinely love to hear about it. What brand of case did you end up using? Did you run into any fit issues I did not cover here? — especially if you found a better way to tackle the angle cut.
Related
- 30 Days of Finger Drumming Practice: What Changes
- Launchpad and Maschine Setup for Finger Drumming
- 15-Minute Finger Drumming Practice Routine
One afternoon. One case. Zero scratches on the other side.
— ToneSharp