Search “hi-hat roll tutorial” and every result teaches you the same thing: hold a pad, turn on an arpeggiator, set the subdivision to 32nd notes, automate the velocity in your piano roll. That’s a perfectly good way to build a beat. It is not finger drumming — it’s MIDI programming wearing a finger drumming costume.
Trap and drill production has spent the last few years getting faster, denser, and more hybridized — Atlanta-core, NY drill-trap, Afro-trap, you name it — and in nearly all of it, the hi-hat is the load-bearing wall. It’s the one element that separates a beat that sits there from a beat that moves. If you’re finger drumming and your hi-hat work is limited to steady 16th notes because rolls feel impossible to play cleanly by hand, you’re capping your own ceiling in the genre that rewards hi-hat work the most.
This guide is about playing rolls — actually playing them, with fingers, at tempo, with control. We’ll cover what a roll is structurally (it’s not just “fast”), how to choreograph it across your hands, how to shape velocity so it doesn’t sound robotic, a trick for faking pitch variation without a pitch-bend wheel, three drills to build the motor skill, and — honestly — when playing it live isn’t even the right call.
What's Inside This Guide
The Gap Nobody’s Teaching
If you read enough production blogs, you’ll notice hi-hat rolls get described almost entirely in DAW terms: note repeat, arpeggiator divisions, automation lanes. That’s not wrong — it’s just answering a different question. It tells you how to generate a roll. It doesn’t tell you how to play one, which is a completely different skill built on completely different constraints.
When you program a roll, the computer guarantees perfect timing and you fight to make it sound human. When you finger drum a roll, your hand already has the human feel — what you’re fighting for is consistency. Those are inverse problems, and almost nothing written about hi-hat rolls online addresses the second one.
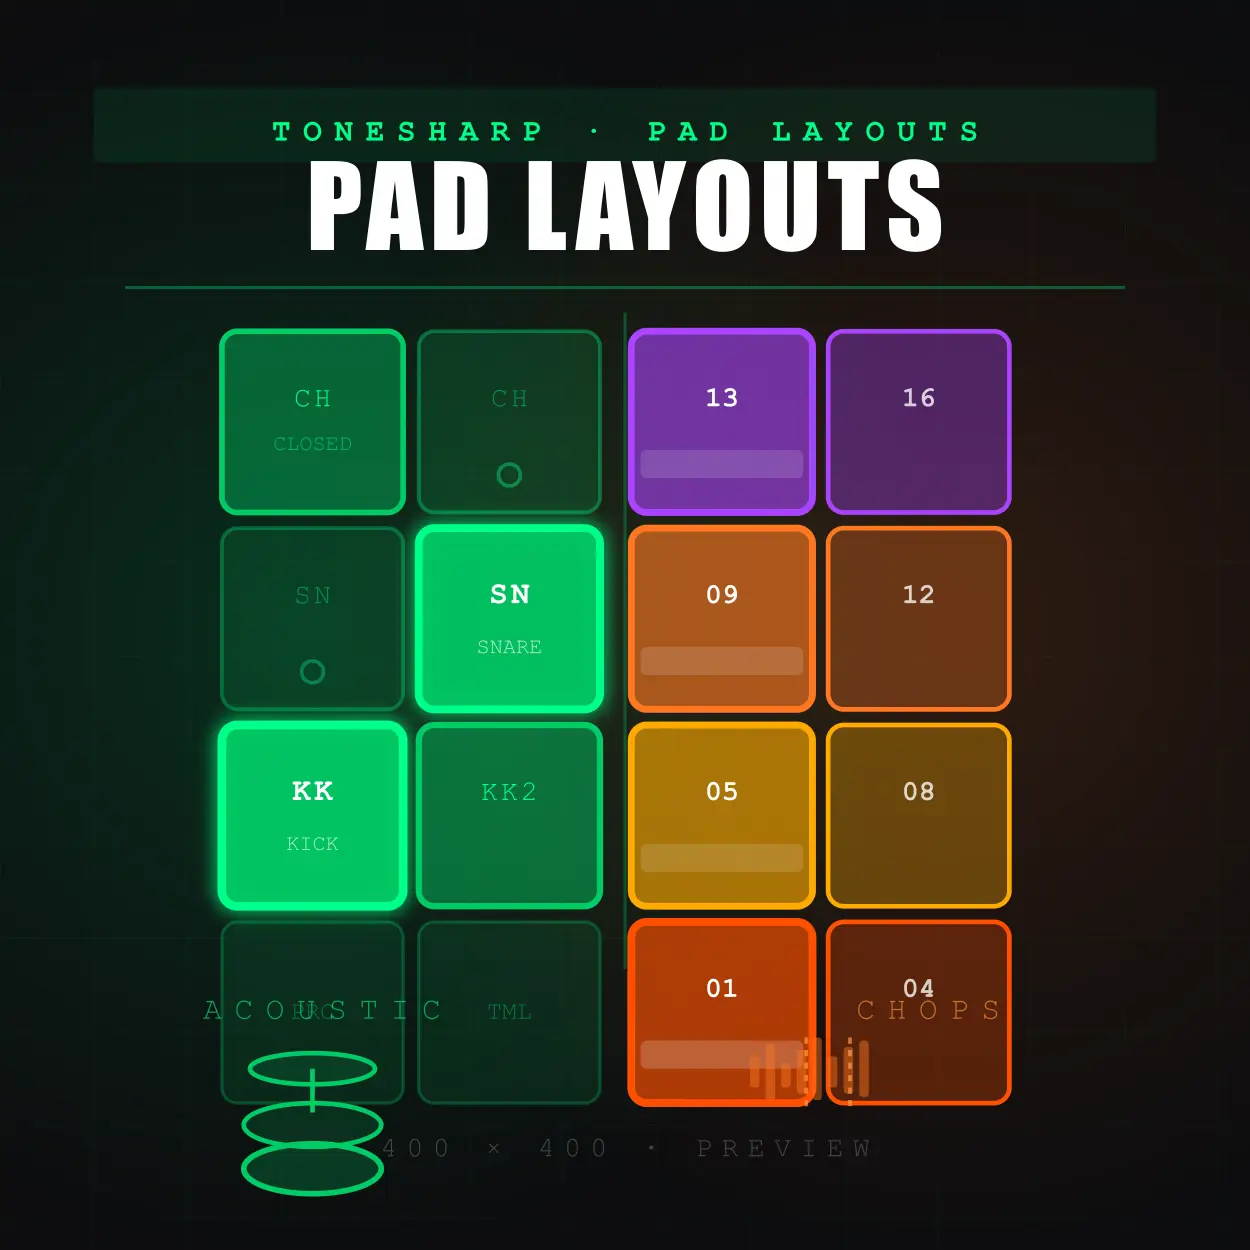
The pad-layout work from last week’s guide set up the architecture. This guide is about what you do with that architecture once a fast, dense hi-hat pattern is the thing standing between you and a finished beat.

Anatomy of a Roll: Length, Density, and Landing
A roll is not just “a fast hit.” It’s three independent decisions stacked on top of each other, and most beginners only ever make one of them — usually by accident.
Length. How many hits make up the roll? Three is the minimum that reads as a “roll” rather than a flam. Six is the common mid-length burst. Twelve-plus starts to feel like a sustained texture rather than a discrete event. The trap producers who get cited as hi-hat benchmarks — Metro Boomin, Southside, Pi’erre Bourne — almost never repeat the same roll length twice in a bar. That variation is not decoration; it’s the entire reason their hats sound alive instead of looped.
Density. What note value are the hits actually landing on? A roll built from straight 16th notes feels mechanical and grid-locked. The same hit count built from a triplet subdivision feels like it’s leaning forward, pulling at the beat. Density is a feel decision as much as a speed decision — two rolls with identical hit counts can sound completely different in character depending on whether they’re straight or triplet-based.
Landing. Where does the roll resolve? This is the detail beginners skip entirely. A roll that just stops is unfinished. A roll that lands exactly on the next backbeat — snare or kick — reinforces the groove instead of racing past it. The last hit of the roll and the next structural hit should feel like they arrive together, not like two unrelated events that happened to be near each other.
Put those three together and “play a hi-hat roll” becomes a much more specific instruction: choose a length, choose a density, and choose where it lands — every single time. That’s the skill. Speed is just the byproduct of practicing it enough.

Finger Choreography: Who Plays What
How fast you can physically play a roll is determined almost entirely by how many independent contact points you’re using, not by how hard you practice a single finger.
Single-finger rolls. One finger, one pad, repeated. This is the most intuitive approach and the hardest one to scale. A single finger has a natural recovery time between strikes — the muscle has to lift and reset before it can fire again — which puts a hard ceiling on roll speed somewhere around 8–10 hits per second for most players, even with years of practice. Use single-finger rolls for short 3-hit bursts where speed isn’t the limiting factor. Don’t try to force a 12-hit roll through one finger; you’ll hit the ceiling and the hits will start blurring together unevenly.
Alternating fingers, same hand. Index and middle finger trading strikes on the same pad roughly doubles your sustainable speed, because each finger gets a full recovery cycle while the other one fires. This is the same mechanical principle as a drummer’s single-stroke roll on a snare, just translated to two fingers instead of two sticks. If you set up your layout with the hi-hat reachable by both your index and middle finger without crossing or stretching, this becomes your default roll technique for anything 6 hits or longer.
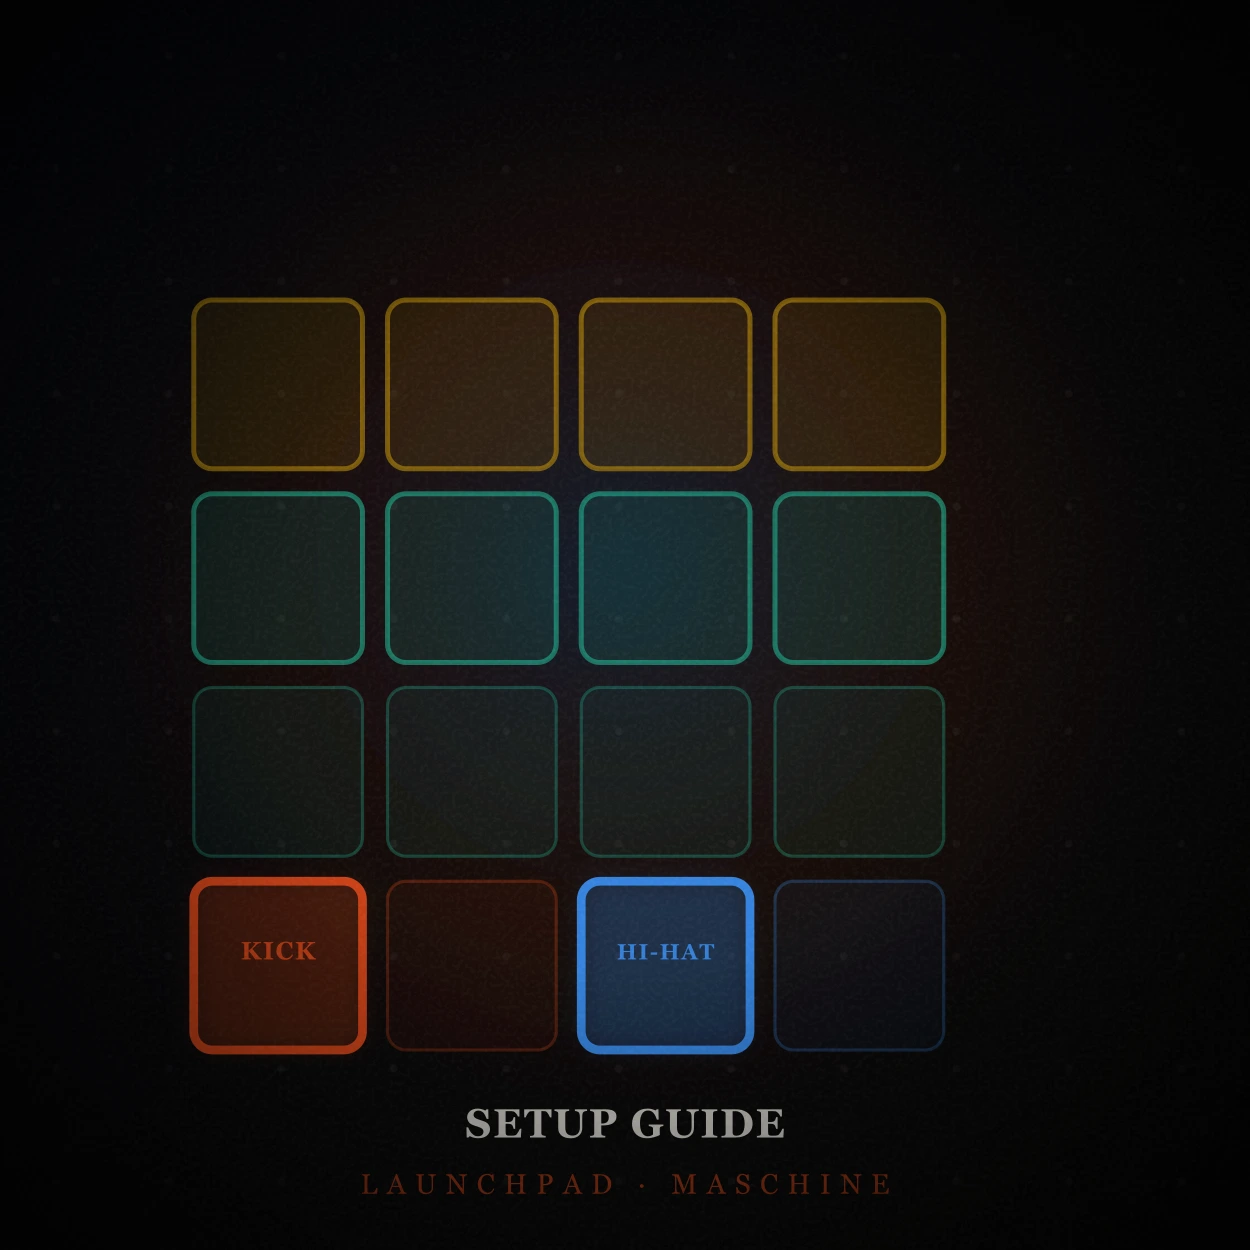
Two-handed alternation. If you built the Double-Hat Split layout from last week, you already have two physically separate hi-hat positions — one per hand. Alternating hands instead of fingers gives you the longest recovery window of any technique and is the only realistic way to sustain a roll past 12 hits without the velocity collapsing toward the end. It’s also the technique that produces the most human-sounding timing, because two hands never fire with perfectly identical micro-timing the way one finger repeating itself tends to.
The practical rule: match the technique to the roll length. Short bursts (3 hits) — single finger is fine. Medium bursts (6 hits) — alternate fingers on one hand. Long bursts (8+) — alternate hands, or don’t attempt them live at all (more on that in the live-vs-loop section).

Velocity Shaping: The Decay Curve
A roll played at one constant velocity sounds like a typewriter. A roll that’s musically convincing almost always shapes velocity across its length, and there are exactly two shapes worth knowing.
The crescendo roll starts soft and builds in intensity toward the landing hit. This is the classic “rising tension” roll — it tells the listener something is about to happen, and the loudest hit coincides with the resolution. Physically, this means your first one or two strikes should be deliberately restrained — almost a ghost-note velocity — with each subsequent hit hitting slightly harder than the last.
The decay roll starts at full intensity and tapers off. This reads as an accent that’s dissolving rather than building — useful directly after a snare hit, where you want energy without competing with what just happened. Start your first hit at full force and consciously ease off with each successive strike.
Most beginners default to a flat roll without realizing it, because under time pressure your hand naturally normalizes velocity — every hit ends up landing with roughly the same force just to survive the tempo. Fixing this isn’t really a finger-drumming skill so much as an awareness skill: you have to consciously decide which shape a roll is going to take before you play it, the same way you’d decide a melody’s dynamics before singing it. If you haven’t worked through deliberate velocity control yet, the guide on humanizing your patterns covers the same underlying skill from the programming side — it’s worth reading both directions.
💡 Real Talk: Record yourself playing a roll, then listen back without watching your hands. If you can't tell whether it was supposed to crescendo or decay, it didn't — it was flat. Flat rolls aren't wrong, but they should be a choice, not a default.

The Two-Tone Trick: Faking Pitch Variation Live
Drill and modern trap production leans heavily on detuned, pitched hi-hats — the same one-shot sample shifted up or down mid-pattern to create melodic movement out of what is technically still “just a hi-hat.” Done entirely in a DAW, this is trivial: pitch-shift a few hits in the piano roll and move on.
Played live with fingers, you don’t have a pitch wheel on most pad controllers. What you do have is a second pad. The workaround — and it’s a real technique, not a compromise — is to assign a second hi-hat timbre (not necessarily pitch-shifted, just a different sample of the same instrument) to an adjacent pad, and treat the two pads as a single “voice” that you alternate between during a roll. The ear hears timbral movement inside the roll even though you’re triggering two static samples rather than genuinely sweeping pitch.
This is also exactly why the sample-pack side of hi-hat production includes dedicated “tune roll” variants — pre-pitched takes of the same loop designed to be dropped in next to your straight rolls. Live, the two-pad trick gets you 80% of that effect with zero extra gear. For the other 20% — true continuous pitch movement — that’s a production-stage decision, not a performance-stage one, and that’s fine. Know which problem you’re solving with your hands and which one you’re solving later in the mix.

Three Drills to Build Roll Control
Work through these in order. Each one isolates a specific constraint from the sections above before combining them.
Drill 1: The 3-Hit Pickup
Just snare and hi-hat. The goal is a clean, evenly-spaced 3-hit burst that lands exactly on the snare — no kick to think about yet.
Steps 3–5 are the burst, landing together with the snare on step 5. Start at 70 BPM and don’t move the tempo slider until all three hits sound identical in volume and spacing — not just “close,” identical. Most players rush this drill because it feels too easy at slow tempo; resist that. Clean at 70 BPM is what makes clean at 140 BPM possible at all.
Drill 2: The 6-Hit Roll
Same concept, doubled in length, with the kick reintroduced. This is where you should switch to alternating fingers on the hi-hat if you haven’t already — a single finger will start to choke past 4–5 hits at this tempo.
Steps 4–9 are the roll — six consecutive hits resolving onto the snare at step 9. Try playing it twice: once as a crescendo (quiet start, hit the snare-aligned final note hardest) and once as a flat roll, so you can hear the difference described in the velocity section rather than just reading about it.
Drill 3: Variable-Length Performance Pattern
The full lesson in one bar — a 3-hit roll resolving on beat 2, a 6-hit roll resolving on beat 4, an open hi-hat as a breath afterward, and a kick/hi-hat unison on beat 1. This is deliberately built so no two rolls in the bar are the same length, the same lesson the reference tracks teach by ear.
Notice the hi-hat is deliberately silent on steps 2, 6, and 7 — those rests are what make the two rolls (steps 3–5 and steps 8–13) audible as distinct events rather than dissolving into a wall of continuous 16ths. A hi-hat that never stops can’t accent anything, because everything is equally loud. Space is what gives a roll somewhere to land.
Live Hands vs. Pre-Built Loops
Here’s the part most tutorials won’t tell you, because most tutorials are trying to sell you on one technique exclusively: there are real situations where the right call is to not play the roll by hand at all.
Live-played rolls earn their place when the imperfection is the part. A roll with natural human velocity drift, recorded in a single take alongside the rest of your groove, has a feel that’s genuinely difficult to recreate by stacking MIDI events — and if your goal is a performance-style beat, that human variance is the entire point of finger drumming in the first place.
Pre-built loops earn their place when you need a specific, repeatable, studio-polished result faster than you can currently play it — which, if you’re being honest with the 3/6/12-hit drills above, is most of the time while you’re still building this skill up. There’s no shame in that. A producer on a deadline reaching for a ready-made roll isn’t cheating; they’re making a tooling decision, the same way a drummer reaches for a sampled fill instead of re-recording a take from scratch.
This is exactly the gap the Hi-Hat Loops pack is built for — straight loops, roll loops, and tuned-roll variants, all with MIDI versions included so you can still edit the timing and velocity by hand once you’ve got a usable starting point. Here are all three variants from the pack, for reference against the drills above:
"Molten" — Straight – 155 BPM
"Bouncy" — Roll – 130 BPM
"Movement" — Tune Roll – 136 BPM

The honest workflow most working producers land on is a blend: program or drop in the loop for the backbone of the track, then re-play the fills and transition rolls live for the moments that need a human touch. You don’t have to pick a side. You just have to know which problem you’re solving at any given moment.
Common Mistakes
Same length, every time. If every roll in your beat is 3 hits, your hat work is a metronome with extra steps. Vary the length deliberately, bar to bar.
Flat velocity by default. Covered above, but it’s the single most common giveaway of a programmed-sounding live performance. Decide on a shape before you play.
No landing. A roll that trails off into silence instead of resolving onto the next structural hit feels unfinished, even to listeners who couldn’t tell you why.
Rushing past the slow-tempo drills. Every drill above is listed with a deliberately conservative starting tempo. Skipping straight to performance tempo doesn’t save time — it just means you practice the mistake instead of the technique, and then have to unlearn it later.
Treating rolls as decoration instead of structure. A roll should be doing a job — building toward a hit, releasing tension after one, bridging two sections. A roll with no rhythmic purpose is just noise with good PR.
Rolls are the one piece of hi-hat vocabulary that separates a programmed-sounding pattern from a played one, and they’re learnable in exactly the same incremental way as everything else in finger drumming: slow, isolated, deliberate, then fast. Nobody plays a clean 12-hit roll on day one. Everybody who plays one now started with a 3-hit pickup at 70 BPM.
— ToneSharp
Related
- Week 8 – Trap Basics: Hi-Hat Rolls, 808 & The Modern Groove
- How to Make Your Beats Sound More Human Without Live Drums
- The Definitive Guide to Finger Drumming Pad Layouts