🥁 The Brutal Truth About Modern Drum Programming
Let me paint a picture you've probably lived through.
You're staring at a piano roll in your DAW. Click. Drag. Adjust velocity. Nudge timing. Copy. Paste. Repeat. Three hours later, your drum pattern sounds... fine. Technically correct. Rhythmically accurate. Completely lifeless.
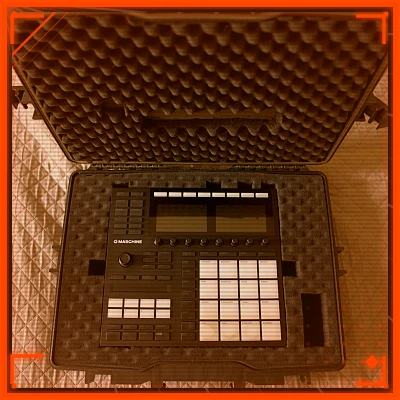
Meanwhile, you've watched YouTube videos of producers banging out fire beats in minutes on an MPC or Maschine, vibing with the hardware, creating drums that breathe and groove naturally. And you think: "I need that controller."
But here's what nobody tells you: buying a Maschine MK3 won't magically fix your drums if you use it like a mouse with fancier buttons.
The difference between producers who create incredible drums on Maschine and those who struggle isn't the gear—it's understanding the philosophy behind the hardware-software hybrid workflow. It's knowing when to perform, when to edit, and when to let the machine do the heavy lifting.
I've spent countless hours working with Maschine, and I've watched countless producers buy the hardware, use it for a week, then go back to clicking drums in their DAW because they never learned the actual workflow. Don't be that person.
This isn't a manual. Native Instruments already wrote that (and nobody reads it). This is the real-world workflow that turns Maschine from an expensive paperweight into your primary beat-making weapon.
What You'll Learn in This Guide
- Why Your Drum Programming Feels Like Work (And How Maschine Fixes It)
- Understanding the Maschine Ecosystem: Software + Hardware
- Setting Up Your Maschine for Maximum Drum Performance
- The Three-Phase Drum Creation Workflow
- Advanced Techniques That Separate Amateur from Pro
- Common Mistakes That Kill Your Drum Sound
- The Reality Check: When to Use Hardware vs Software
🤔 Why Your Drum Programming Feels Like Work (And How Maschine Fixes It)
The fundamental problem with programming drums in a traditional DAW is this: you're using a visual interface to create something that should be felt.
Think about it. A drummer doesn't stare at sheet music and place notes on a grid. They feel the groove, respond to the music, and play dynamics naturally. Your click-and-drag workflow forces you to think about rhythm instead of feeling it.
This is where most producers misunderstand what Maschine actually is. They think it's just a fancy MIDI controller. Wrong. Maschine is a performance instrument that happens to integrate with production software.
Here's the shift that changes everything:
- Traditional DAW approach: Program drums → Listen → Tweak → Repeat until it sounds human
- Maschine approach: Play drums like an instrument → Capture the performance → Polish the details
The goal isn't to eliminate the mouse. It's to use hardware when you need performance and feel, and software when you need precision and editing.
When you understand this, everything clicks. You stop fighting the workflow and start leveraging it.
🔧 Understanding the Maschine Ecosystem: Software + Hardware
⚡ What Makes MK3 Different from Controllers
Let's clear this up immediately: Maschine MK3 is not just a MIDI controller.
A MIDI controller sends note messages to your DAW and waits for instructions. Maschine MK3 is a complete production environment that can operate standalone or integrate with your DAW. The difference is massive.
What MK3 gives you that controllers don't:
- Dual high-resolution color screens - You can see waveforms, edit parameters, and arrange patterns without looking at your computer
- Velocity-sensitive pads with aftertouch - Not just "sensitive," but actually responsive enough for expressive finger drumming
- Dedicated browser and editing controls - Navigate thousands of sounds without touching your mouse
- Audio interface built-in - Route audio directly without additional hardware
- Tactile control over every software parameter - Touch-sensitive encoders that respond to your workflow speed
This isn't about workflow preference. It's about speed and creative flow. When you can audition sounds, build patterns, adjust levels, and apply effects without breaking your creative momentum, you make different decisions—better decisions.

🧠 The Software Brain Behind the Hardware
The Maschine software is where the magic actually happens. The hardware is just the most intuitive way to control it.
Here's what makes Maschine software unique:
Pattern-based workflow: Unlike traditional DAW timelines, Maschine thinks in scenes and patterns. You create multiple pattern variations, then trigger them in real-time or arrange them in the sequencer. This mirrors how actual drummers play—they have fills, verses, choruses ready to go.
Group-based sound design: Each group can have up to 16 sounds with independent effects and routing. Your kick isn't just a sample—it's a sound with compression, EQ, and saturation baked into the group channel. This encourages you to think in complete drum kits rather than individual sounds.
Integrated sample manipulation: Slice loops, time-stretch samples, pitch-shift on the fly—all without leaving the Maschine environment. The software handles this transparently while you focus on creativity.
The hybrid reality: You can run Maschine standalone for pure beat-making, or as a plugin in your DAW for full production integration. Most pros do both—sketch beats standalone for speed, then move to DAW for final arrangement and mixing.
🎛️ Setting Up Your Maschine for Maximum Drum Performance
🔨 Hardware Configuration That Makes Sense
Step 1: Pad Sensitivity (This is Critical)
Out of the box, MK3 pads are calibrated conservatively. For drum programming that feels natural, you need to recalibrate.
Go to File - Preferences - Hardware to enter touch sensitivity settings. Use the Touch Sensitivity slider to adjust the reaction of the Pads to your touch. This parameter sets a threshold from which the Maschine controller will register a hit..
Step 2: Screen Brightness and Contrast
Those dual screens are gorgeous but will destroy your eyes in a dark studio. Go to Settings → Hardware → Display and dial brightness down to 60-70%. Your retinas will thank you at 2 AM.
Step 3: Button LED Brightness
Same deal. Full brightness buttons are unnecessarily flashy and distracting. Reduce to 50% unless you're performing on stage.
Step 4: Audio Interface Configuration
If using MK3 as your audio interface, set buffer size based on your workflow:
- - Recording live drums: 128 samples or lower (minimal latency)
- - Mixing and arranging: 512-1024 samples (CPU efficiency)
🎯 The Three-Phase Drum Creation Workflow
Phase 1: Sound Selection and Kit Building (The Foundation)
The mistake everyone makes: Loading random drum sounds and hoping they'll work together.
The pro approach: Curate your kit before you start programming.
Press BROWSE on MK3. Use the encoder to scroll through kicks. Don't settle for the first good one—audition at least 20. You're not wasting time; you're building a sonic palette that already works together.
Here's the kit-building order that actually works:
- Kick first - This defines your low-end character. Everything else will relate to this choice
- Snare or clap second - This needs to cut through the kick without fighting it
- Hi-hats third - Closed, then open, then variations. These create the groove skeleton
- Percussion last - Shakers, rides, effects that fill space without cluttering
Pro tip: Load sounds from the same sample pack or expansion. They're already processed to work together. Mixing sample packs requires more EQ and mixing work later.
Use the pad-linking feature: Hold DUPLICATE + press multiple pads to load variations of the same sound (multiple snare samples, different hi-hat closeness). This gives you instant variation without breaking your workflow.
Phase 2: Pattern Creation and Performance (The Fun Part)
This is where Maschine's hardware shines. You're not clicking notes—you're performing drums.
Start with the foundation:
- Press SHIFT + PLAY to Count-In recording
- Hit your kick drum pad on beats 1 and 3 (or wherever your groove lands)
- Don't overthink—just tap the rhythm. Smart Play will tighten it up
Layer the groove:
- Press OVERDUB ( REC ) at any (now you're adding to the existing pattern, not replacing)
- Add your snare hits on 2 and 4 (or your genre's variation)
- Keep overdubbing: add hi-hats, then percussion, building the pattern in layers
The performance mindset shift: Don't try to play the entire drum pattern at once. Layer it like a drummer would practice—one element at a time until the groove is complete.
Using Note Repeat for hi-hats: Hold NOTE REPEAT + hit a pad to get automatic retriggering. Adjust the rate with the encoder for 16th-note hats or 32nd-note rolls. This is how you get those rapid hi-hat patterns without destroying your fingers.
The velocity variation trick: After recording your basic pattern, press PAD MODE and select change "Fixed Velocity", after that hit FIXED VEL. Re-record specific hits with different velocity values. This creates humanization that sounds intentional, not random.
Phase 3: Arrangement and Polish (The Professional Touch)
You've got a killer 1-bar or 2-bar loop. Now you need to turn it into an actual track.
Pattern duplication for variation:
- Hold DUPLICATE + press your pattern pad
- This creates a copy you can modify for fills, breaks, or drops
- Remove the kick for breakdown sections
- Add extra snare hits for fills
- Thin out hi-hats for verses
Scene arrangement: Scenes in Maschine are like sections in a song. Create scenes for: - Intro (minimal drums) - Verse (main pattern) - Pre-chorus (build tension) - Chorus (full drums) - Break (stripped back) - Outro (wind down)
Swing and groove adjustment: Press SWING and use the encoder. Start at 50% (no swing), then increase to 52-58% for subtle pocket. Hip-hop and trap usually sit around 54-56%. Don't overdo it—too much swing sounds drunk.
Group-level effects that make drums knock:
- Transient Master on the drum group - Increase attack for punchier drums, increase sustain for fuller sound
- Compressor with sidechain - Make your kick duck everything else slightly for modern punch
- Saturator - Add harmonic richness without destroying dynamics
🚀 Advanced Techniques That Separate Amateur from Pro
Technique 1: Pad Mute for Live Performance Variation
Hold MUTE + press pads to mute/unmute sounds in real-time while the pattern plays. This lets you create breakdown sections on the fly.
Technique 2: Step Sequencer for Precise Timing
Sometimes finger drumming isn't the answer. Press STEP to enter step mode. Now each pad represents a 16th note division. Tap pads to place hits with perfect timing—ideal for trap hi-hat programming where specific 32nd-note placement matters.
Technique 3: Lock Library for Workflow Speed
Found a sound library or expansion you love? Press SHIFT + BROWSE to access browser filters. Select your preferred library and press LOCK. Now all browsing stays within that library until you unlock it. This prevents endless scrolling through thousands of sounds.
Technique 4: Sampling Mode for Custom Textures
Press SAMPLING on MK3 to record directly into a pad. Sample: - Your own voice for unique percussive textures - Found sounds (knock on desk, close drawer, snap fingers) - Resampling your own patterns with effects for glitchy variations
Trim the sample using the MK3 encoder, then play it chromatically across the pads. Instant melodic percussion.
Technique 5: Audio Module for Continuous Loops
Load an audio loop into a sound slot, but use the Audio Module instead of the sampler. This lets the loop play continuously, synced to your project tempo, while you layer drum hits on top. Perfect for layering with your programmed drums for a more organic hybrid sound.
❌ Common Mistakes That Kill Your Drum Sound
Mistake 1: Recording Everything at Maximum Velocity
The problem: Bashing the pads as hard as possible makes everything the same volume, eliminating dynamics.
The fix: Practice playing with consistent medium velocity (80-100). Reserve hard hits (110-127) for accents and fills. Your drums will breathe instead of suffocating.
Mistake 2: Never Using the Duplicate Function
The problem: Starting every new pattern from scratch wastes time and disrupts flow.
The fix: Build one solid foundation pattern, then duplicate and modify. This maintains consistency across your track while allowing variation.
Mistake 3: Ignoring Group-Level Processing
The problem: Processing each drum sound individually creates a disconnected kit that doesn't gel.
The fix: Apply compression and saturation to the entire drum group. This "glues" the kit together. Then apply individual sound processing for specific needs.
Mistake 4: Overusing Quantization
The problem: 100% quantization makes drums sound robotic, especially for genres that depend on groove.
The fix: Use SHIFT + QUANTIZE to access quantize strength. Set to 75-85% so hits move toward the grid but retain human feel. Or don't quantize at all—sometimes slightly off-grid is perfect.
Mistake 5: Not Saving Kits and Groups
The problem: Rebuilding your perfect drum kit setup for every new project.
The fix: Once you've built a kit you love, save it as a group. Press SHIFT + GROUP → Save Group. Name it descriptively. Now you can load complete drum kits with all routing and effects in seconds.
🎯 The Reality Check: When to Use Hardware vs Software
Here's what nobody tells you: You don't need to do everything on the hardware.
The best Maschine workflow is hybrid. Use the hardware for what it's great at, and the software for what it's great at.
Use the MK3 hardware for:
- Initial pattern creation - The performance aspect feels better on pads
- Sound browsing - Way faster than clicking through lists
- Live velocity recording - Finger drumming for natural dynamics
- Real-time muting and scene switching - Performing arrangement variations
Use the software interface for:
- Detailed MIDI editing - Moving individual notes by small amounts
- Velocity curve drawing - Creating specific dynamic shapes
- Complex automation - Drawing filter sweeps and parameter changes
- Visual pattern comparison - Seeing multiple patterns simultaneously
Don't be a purist. Be efficient. If clicking in a note is faster than playing it, click it in. If playing it feels better than clicking, play it. The goal is great drums, not hardware dedication.
🏁 The Bottom Line: Drums That Actually Knock
Maschine MK3 isn't magic. It's a tool that becomes powerful when you understand its design philosophy: perform first, edit later.
The hardware eliminates the friction between your musical ideas and their execution. Instead of translating rhythm into mouse clicks, you play rhythm directly. The software captures that performance with enough flexibility to refine it into professional-sounding drums.
But here's the crucial part: the workflow only works if you commit to learning it. You can't dip your toes in, get frustrated after a day, and retreat to your comfortable DAW mouse clicking. Give yourself two weeks of exclusive Maschine use. Force yourself through the learning curve. On the other side, you'll find a drum programming workflow that feels natural instead of tedious.
Your drums will have pocket. They'll have dynamics. They'll groove because you played them that way, not because you painstakingly edited them to sound human.
And that difference? That's what listeners feel, even if they can't articulate why your drums hit harder than everyone else's.
Get your hands on those pads. Stop clicking. Start playing.
— ToneSharp